OAuth Device Flow for IoT with the Microsoft Graph API
Device code flow is an OAuth flow for browserless and input constrained devices which allows a user to authorize an application on a separate device to where it is running.
What is OAuth
Before OAuth when developers needed to access a secure REST API they would often use Basic Auth in which the username and password are base64 encoded and passed across with each API call.
The problem comes when the application needs to access third party data. It is not acceptable, secure or trusted to ask people to enter passwords from a third-party web site into your own application.
OAuth solves the problem by not requiring an application to have access to third-party username and passwords. Instead, applications request an OAuth token (approved by the user) which is then used for each API request until it expires or is revoked.
There are a number of ways your application can request a token, known as “Flows” and each are suited for a different scenario.
What is Device Code Flow
The most frequently used flow is Authorization Code Flow which is a web browser based flow. The user is redirected to the third-party website in order to authorise the application to have an OAuth token.
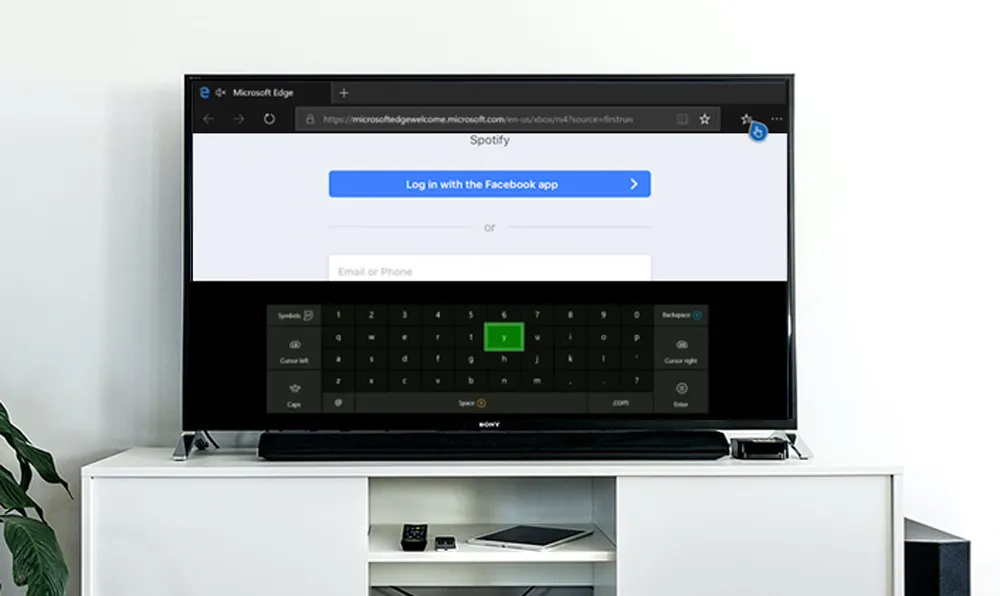
As we can see above authorization code flow is not suitable in all use cases. If you cannot show a web browser such in the case of small IoT device, are using a headless device (accessed via SSH) or where the device has a UI that is not optimised for input such as a TV as shown you need another aproach.
There are flows which can work in this scenario such as “Resource Owner Password Grant Flow” in which you can use a username and password on the first request to access a token. This is however means we still have to handle third party login details and is now marked as legacy.
If both the API and the Application can be secured via secrets you could consider using “Client Credentials Flow” which is designed for machine-to-machine communication. In most cases however when working with IoT this is not the case.
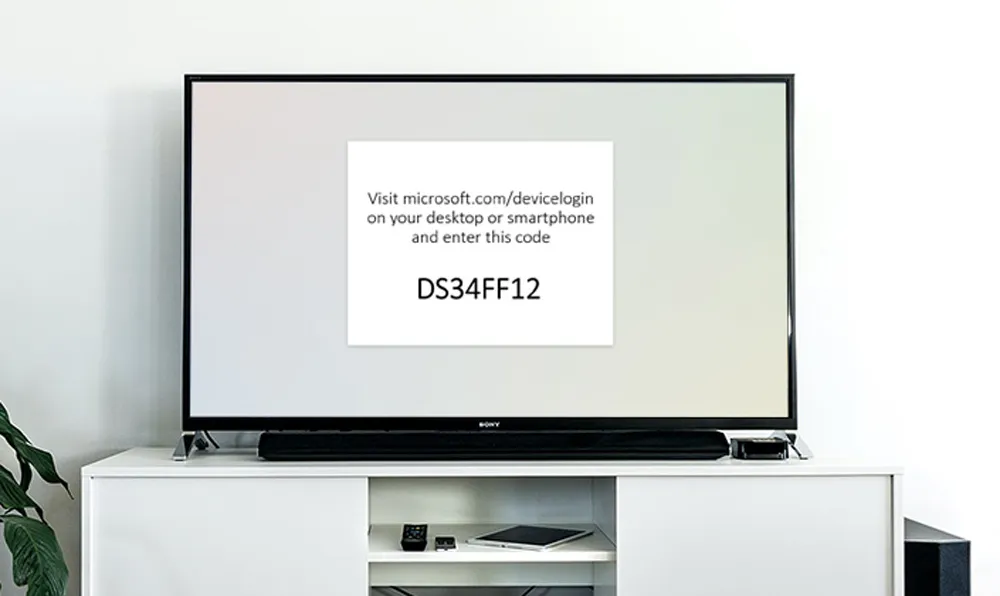
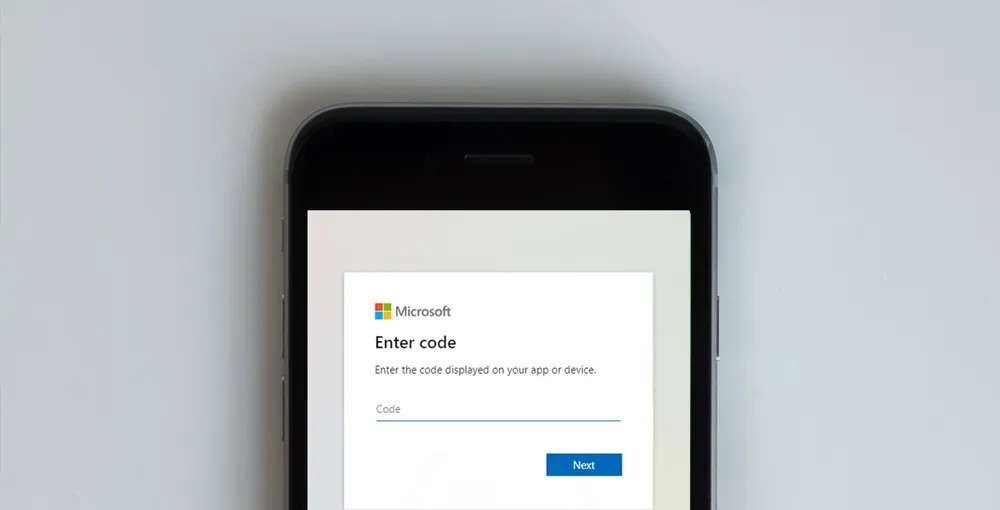
Device Code Flow solves these issues and is described as “An OAuth Device Flow for Browserless and Input Constrained Devices.” Typically, as an end user you are provided with a URL and Code that is shown on the IoT device. You can then navigate to the url and enter the code on a phone or laptop allowing the original device to gain an OAuth token.
How Device Code Flow Works
As with most OAuth flows there are a series of steps required to get the token.
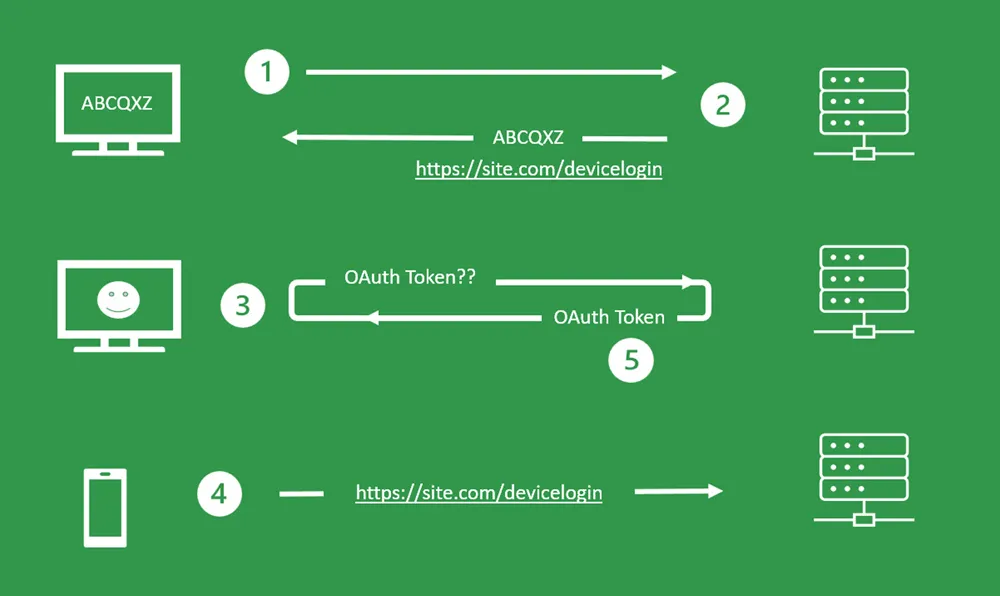
- Application on the IoT device requests code
- The Code and URL is returned and shown to the user
- IoT device polls checking if the user has entered the code
- Users enters code on another device using the URL provided
- IoT device polling now returns a success and an OAuth Token is gained.
Registering your App
You can use device code flow with many popular APIs. It is also supported by both Identity server and Auth0 so you can even use it on your own APIs. In the following sample we will look at how to use it with Microsoft graph API.
In order to use Device Code flow with the MS graph API you first need to register an app on Azure. The following steps outline Azure App Registration for OAuth Device Flow.
This will allow you to access the basic user information used in the sample. Should you want to go beyond the sample you will also need to add each permission you need in the API permission tab.
Once complete the TenantId and ClientId you need can be found on the Overview Page for use in the API calls.
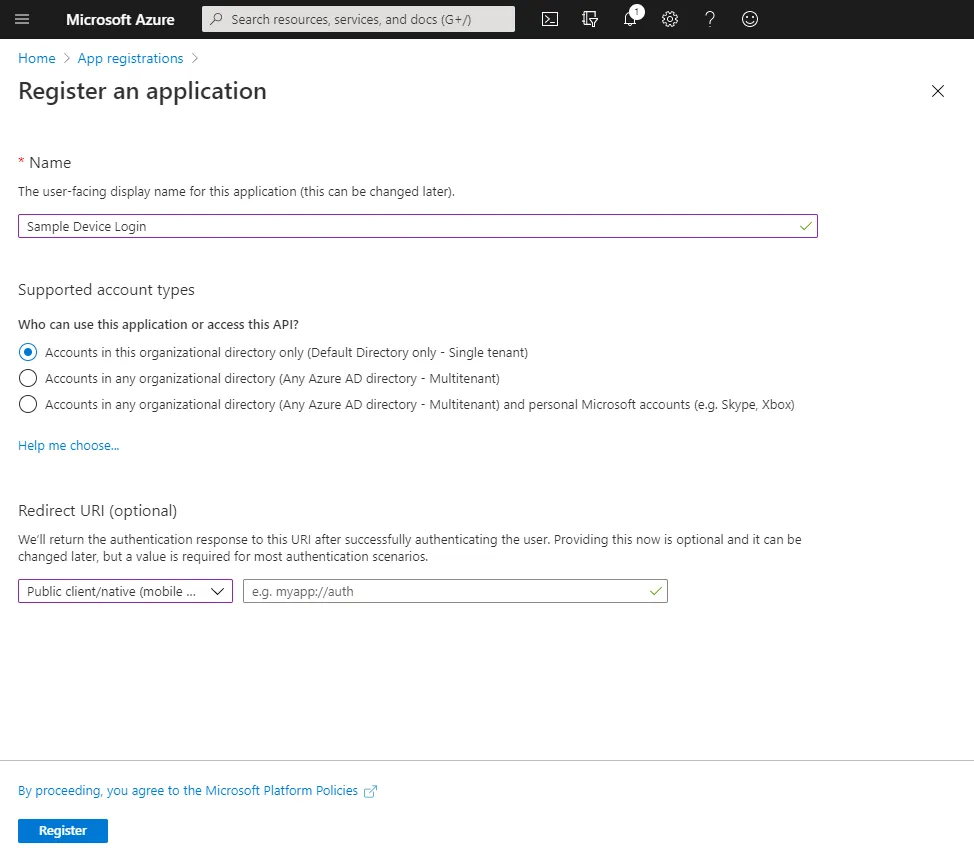
Step 1
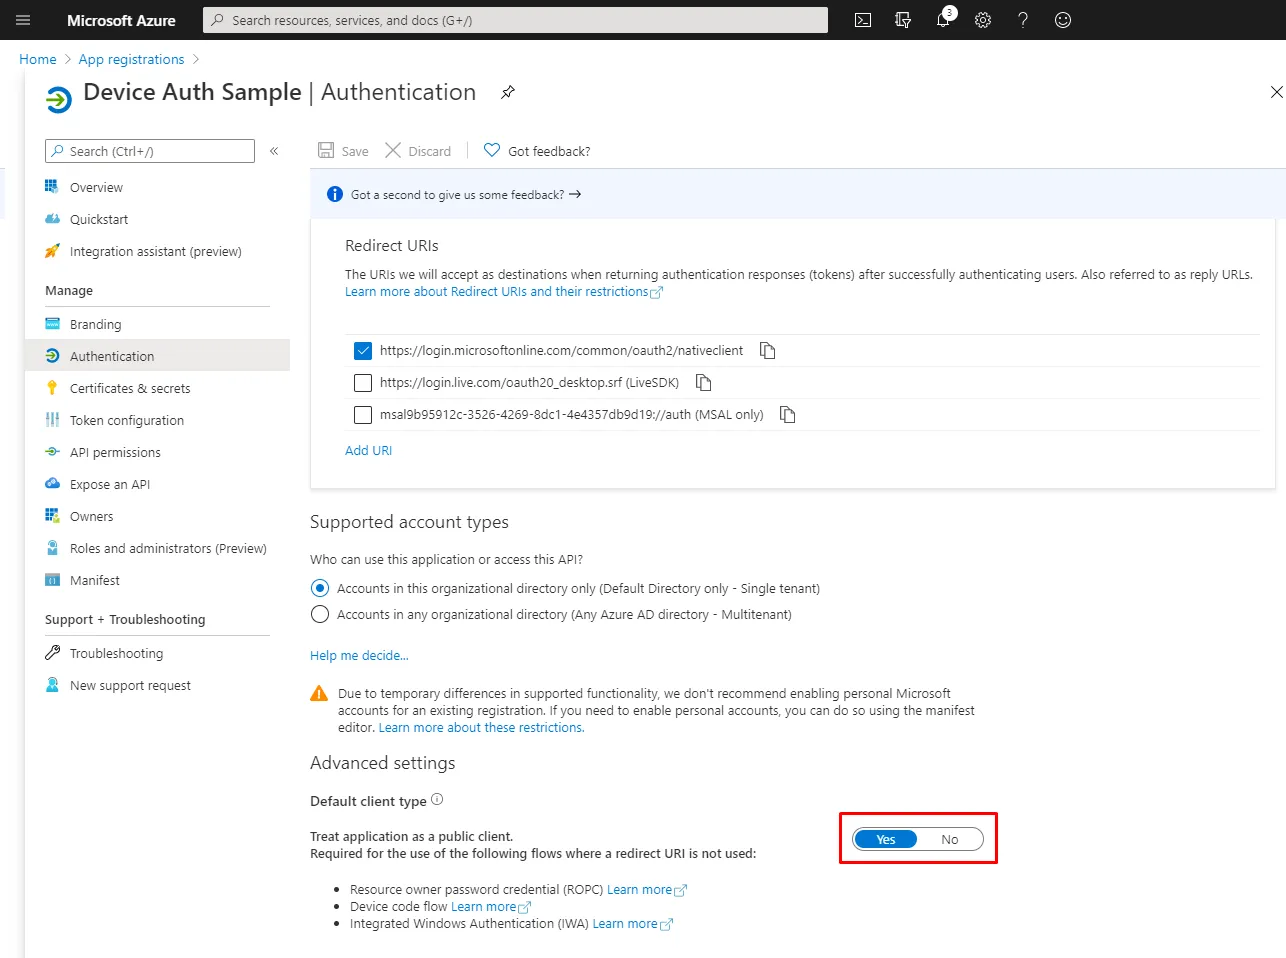
In Azure select to register a new application. You will need to select the Redirect URI as Public client/native.
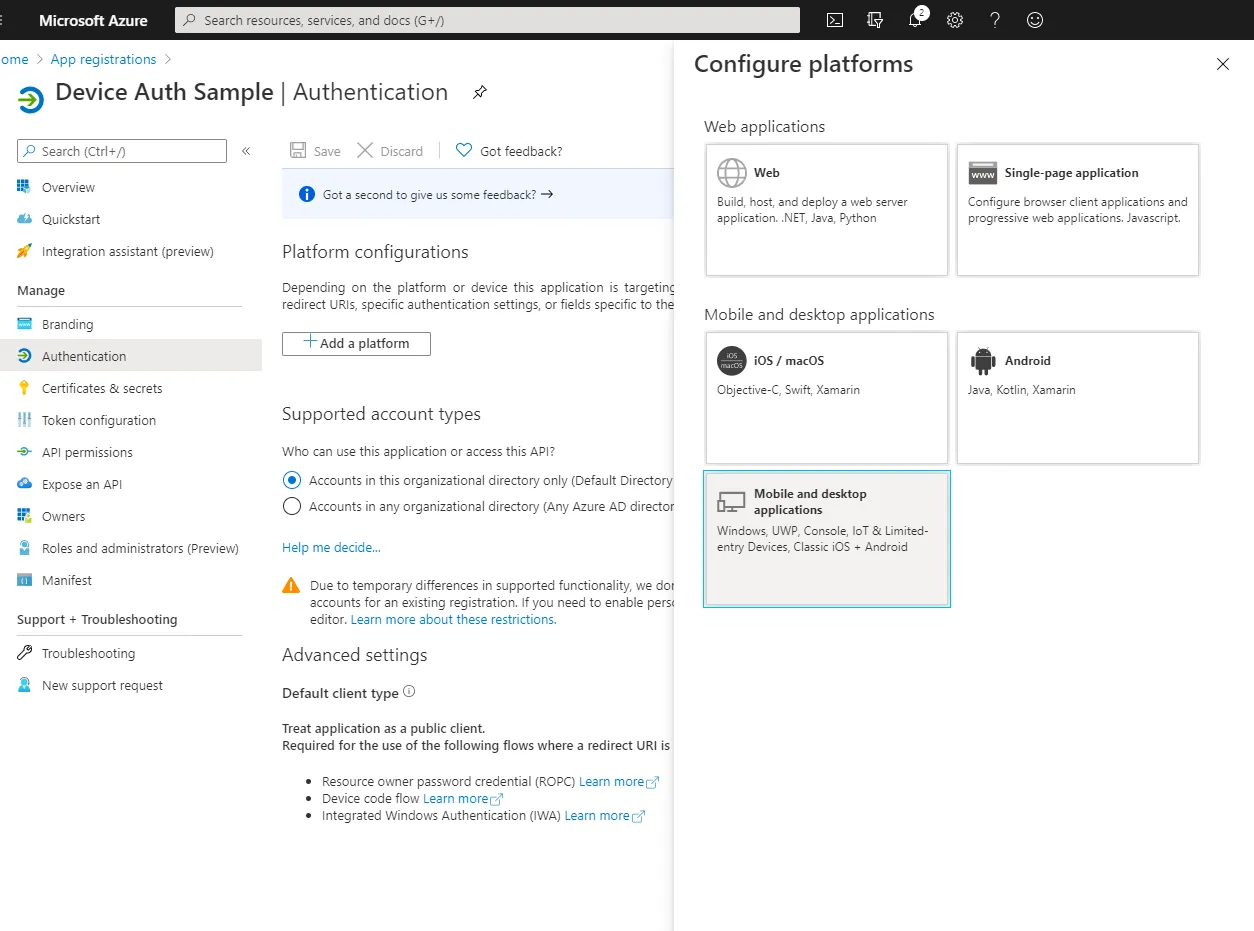
Step 2
From the Authentication tab you will need to add a platform and select “IoT & Limited entry Devices”
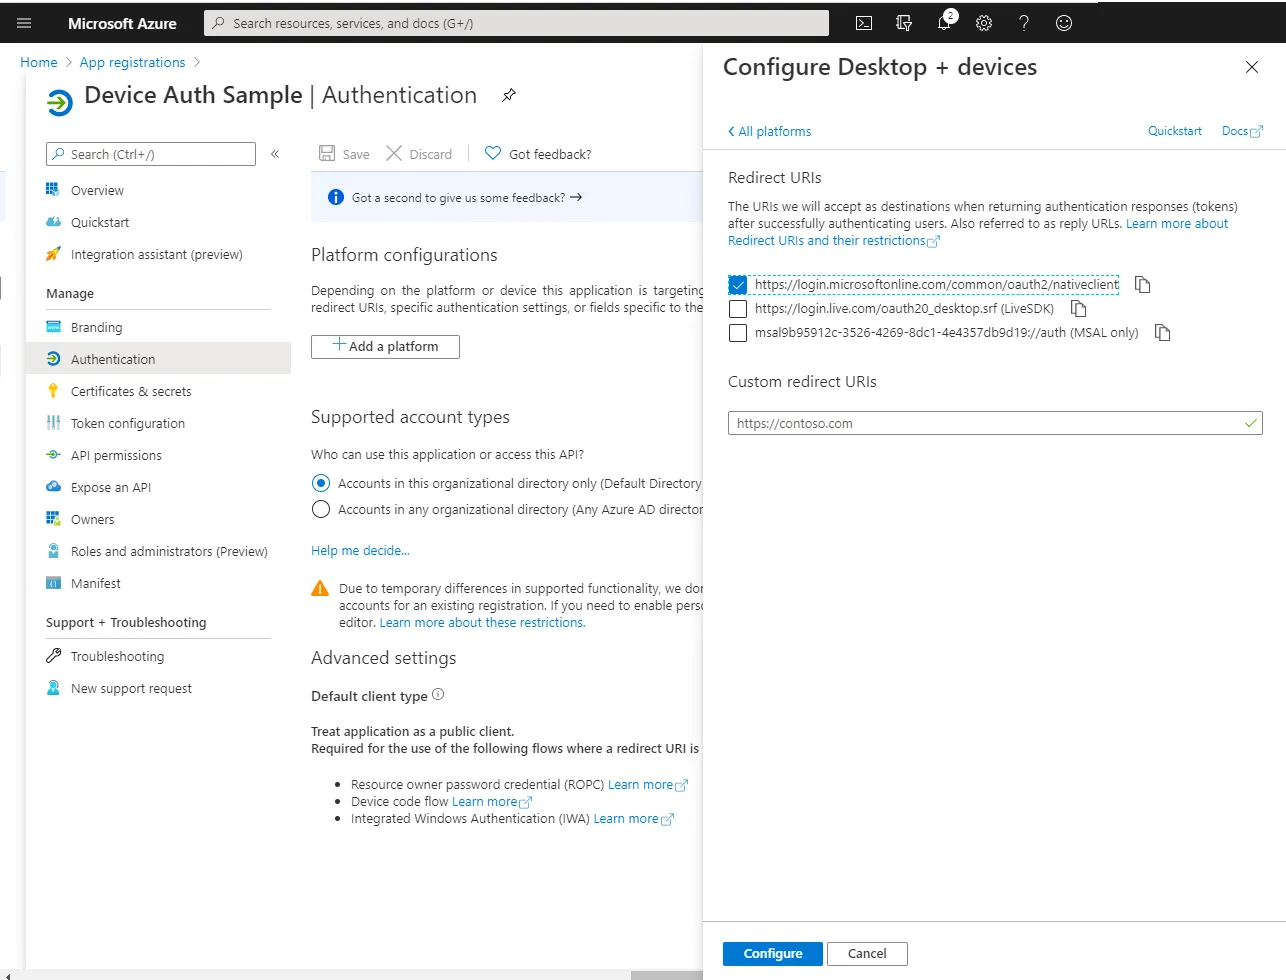
Step 3
Once you have selected the platform you will need to check the Microsoft native client URI.
Step 4
Finally you will need to set the application “Treat application as Public Client”
Rest API Calls
There are client libraries that will make the calls for you however it is relatively simple to perform the API requests manually. The steps are outlined below however I have also made of these calls available as a postman collection on GitHub.
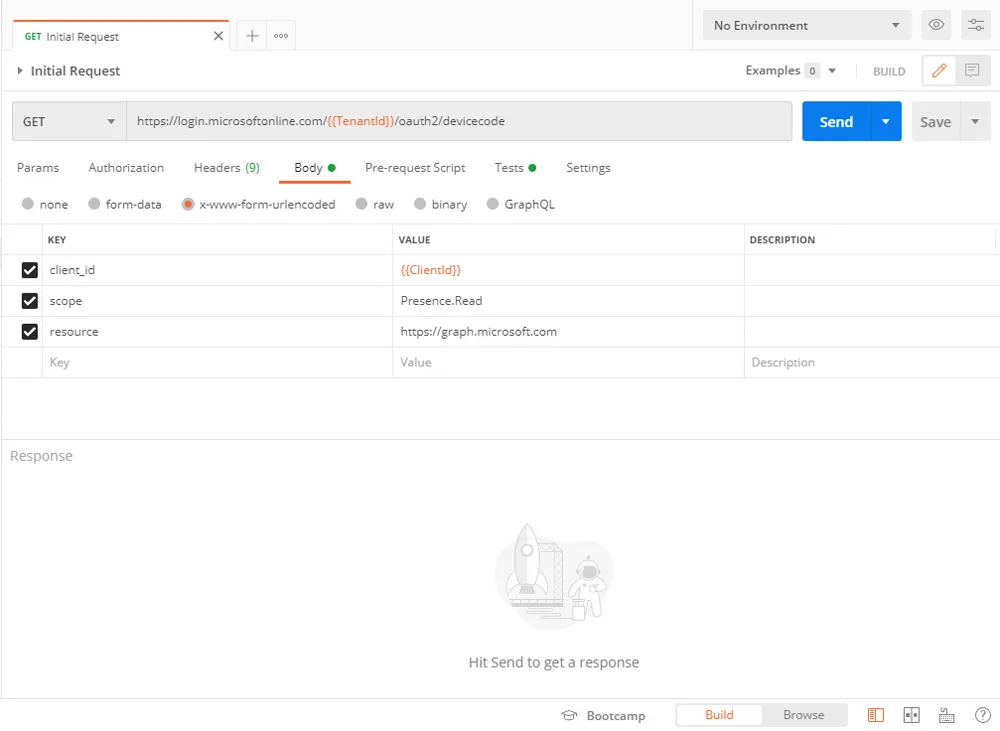
Step 1
Using the the TenantId and ClientId from the Azure Portal the first API call is used to get the url and user code to show to the user.
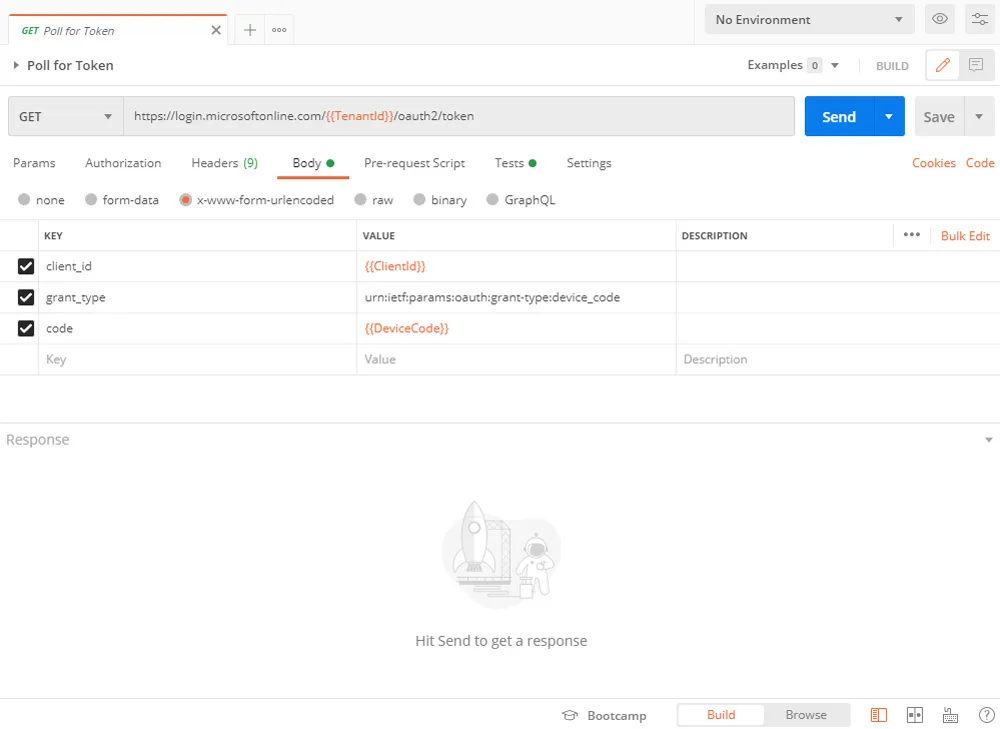
Step 2
Using the device code from the first API call you can now poll to check if a token is available. the poling frequency is also provided in the first API response.
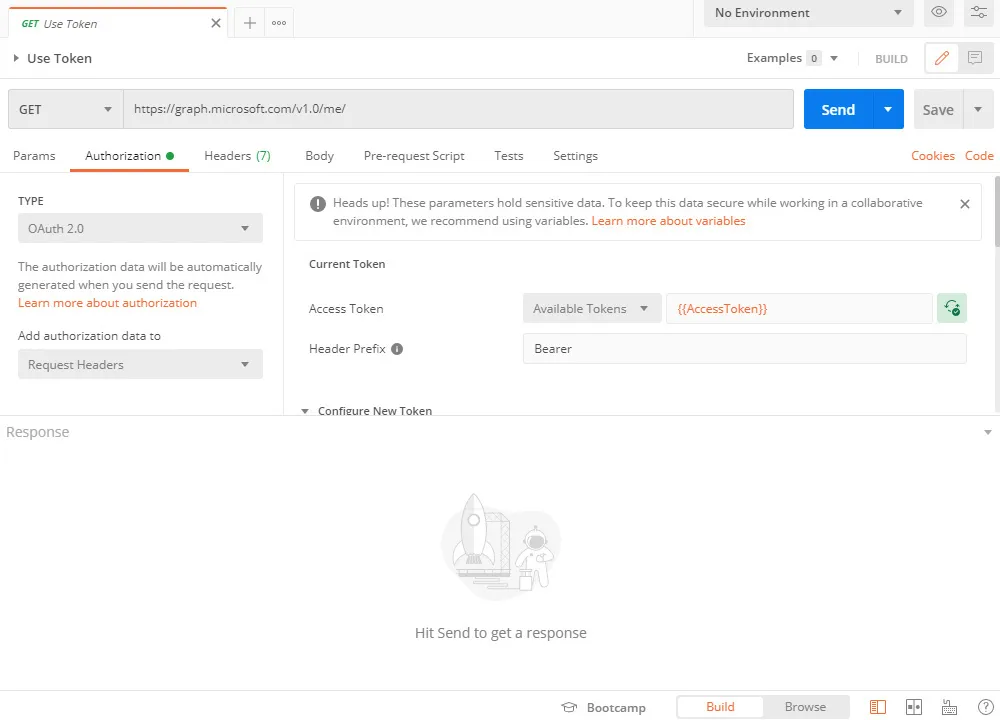
Step 3
Finally, once the user code has been entered by the end user the request in step 2 will give you a token and refresh token. This can then be used to access API data.
Code Sample
A NodeJS sample project along with PostMan collection of API calls can be found on GitHub
Title Photo by NeONBRAND on Unsplash. TV Image by Jens Kreuter on Unsplash