Manual Intervention Steps in Azure Logic apps with MS Teams

It is possible in both Power Automate and Azure logic apps to interact in a range of ways with Microsoft Teams. One of the new additions, is the ability to add in an action step which posts a prompt into Microsoft Teams. The logic app will wait for the users response and then continue based on the reply.
In this post we will run through a demo of an Azure logic app looking first at a simple plain text integration then at a richer solution using adaptive cards.
Design
Ideally, we want to avoid manual steps whenever possible in our applications but sometimes only a human can decide. It is possible to use a Condition action block and prompt only when a condition is met, however in this post we are going to use a simpler flow to demonstrate the processes needed.
In this demo we will configure a http trigger, prompt the user to select the request as either high or normal priority then add the request to the relevant message queue.
Initial Trigger
The Microsoft Teams steps can be integrated with any of the available triggers however we will start by using a simple json payload posted to a http trigger.
{
 	"name": "Sam Green",
    "message": "Urgent, needed for today report pack",
    "uri":"https://files.blueboxes.co.uk/34324.json"
}
Prompting Options
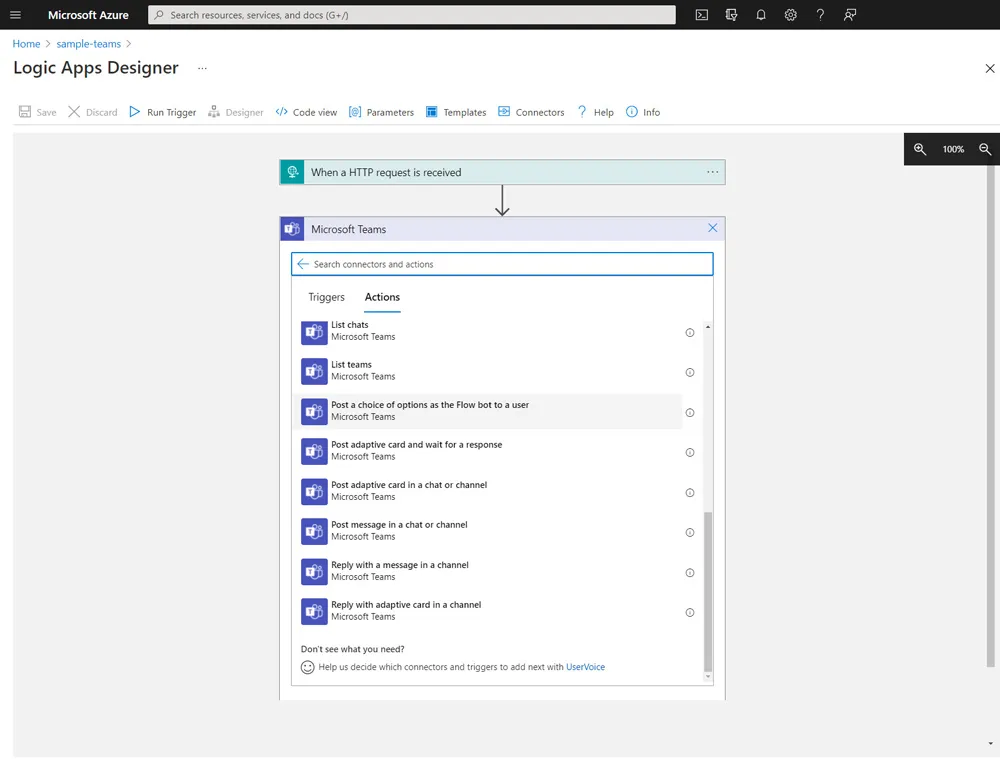
Adding a new action block to your logic app, first search for Microsoft Teams and then select the Post a choice of options as the Flow bot to a user action. Like many connectors the first use will prompt authorisation, in this case with your Microsoft Teams account.
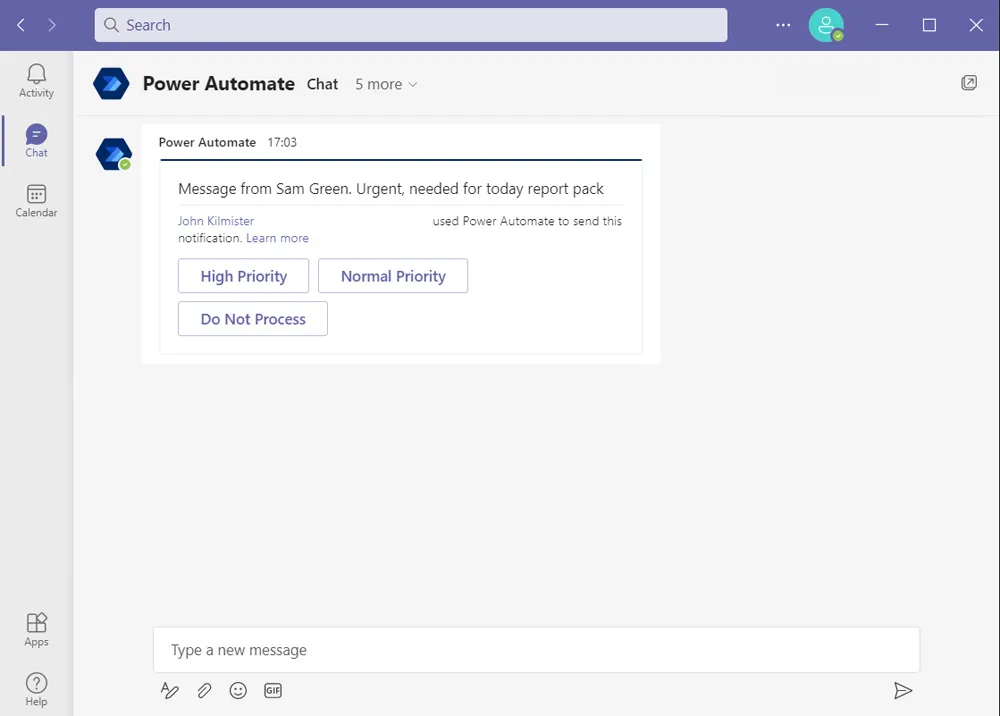
This action block will allow you to enter the options you wish to the user to select from, along with an instructional message. The message can contain data from the initial trigger or any earlier steps if needed, as shown here.
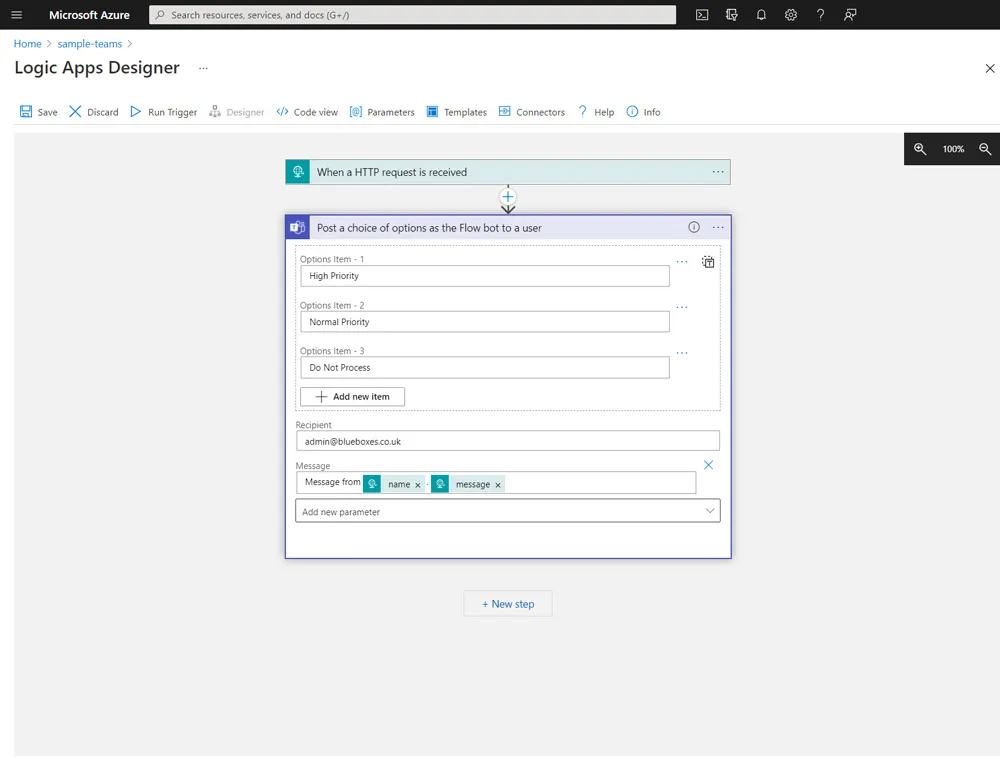
This action block can only be posted to a single user, so we enter their email address. You could change this to be a variable or other input if you need it to be more dynamic.
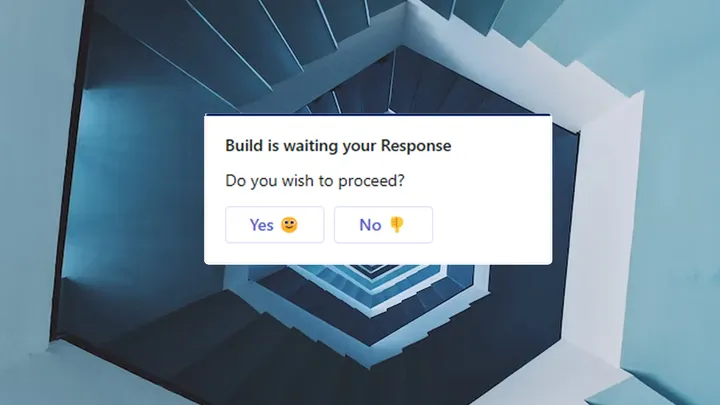
When running, this will then be shown to the user in Microsoft Teams. Once the user has selected an option the control is returned back to the logic app.
Taking Action
We can now add a switch action block to decide how to progress based on the user’s selection. Into the On we will use the selectedOption from the value returned from the Microsoft Teams action block.
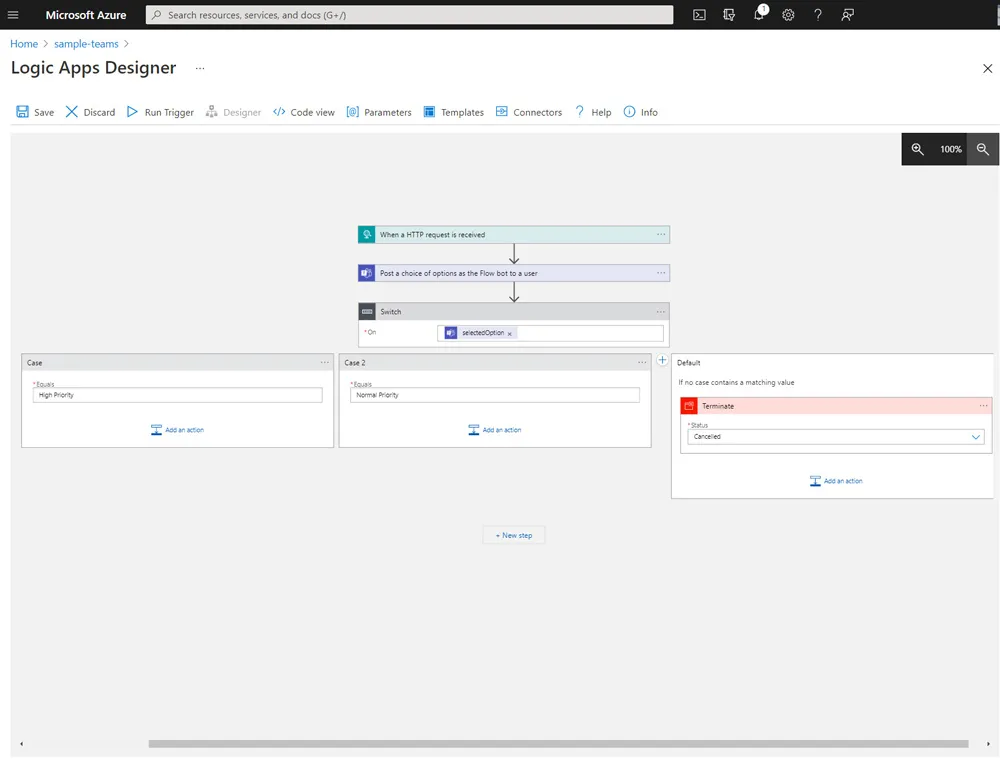
Finally, we can add the action to take for each path. In this case, it is simply adding the request to a message queue for later processing.
Adaptive Cards
Adaptive cards allow us to design our card layouts that can be shown to the user. These can include forms, images, and action buttons. The website adaptivecards.io has many examples of different cards and includes a designer at adaptivecards.io/designer. Once you have built your card in the designer you can copy the JSON and use it in your logic app.
It is worth noting at this time the adaptive cards must be in a maximum version 1.2 format and do not support data binding when working with teams through logic apps.
Adaptive Card Prompting
We will replace the Post a choice of options as the Flow bot to a user block with a Post adaptive card and wait for response block.
The first change is that this now provides extra options such as posting in to a channel or group chat in addition to sending directly to a user.
This time instead of a message and options we will design a simple adaptive card and paste the JSON into the message field. The card will have action buttons that include json data that is sent back once selected.
{
"type": "AdaptiveCard",
"body": [
{
"type": "TextBlock",
"text": "Message From @{triggerBody()?['name']}",
"size": "Medium",
"weight": "Bolder",
"wrap": true
},
{
"type": "TextBlock",
"text": "@{triggerBody()?['message']}",
"wrap": true
}
],
"actions": [
{
"type": "Action.Submit",
"title": "High Priority",
"data": {
"Priority": "High"
}
},
{
"type": "Action.Submit",
"title": "Normal Priority",
"data": {
"Priority": "Normal"
}
},
{
"type": "Action.Submit",
"title": "Do not Process",
"data": {
"Priority": "None"
}
}
],
"$schema": "http://adaptivecards.io/schemas/adaptive-card.json",
"version": "1.2"
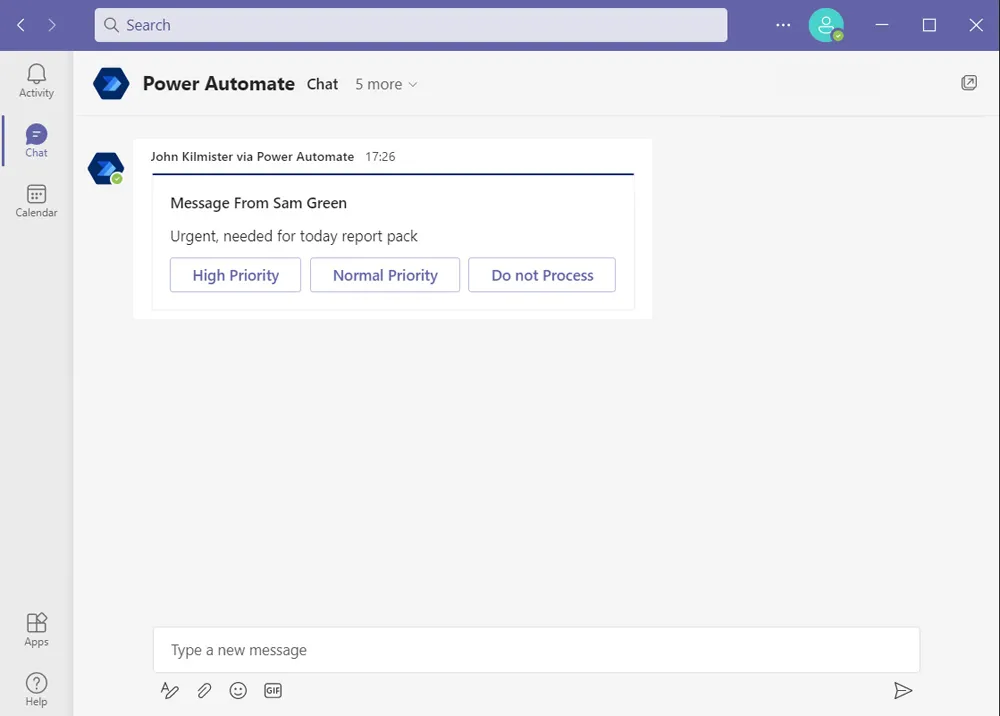
}When this is posted in Microsoft Teams it will be presented as shown below. The design I have created means it does not look much different at the moment. As these are now adaptive cards however you can become much more creative and include images, and other options, receive user input, and return richer data.
Finally, the action block returns data that contains JSON rather than plain text. This can be parsed using a Parse JSON action block before the conditional block is then updated to now use the parsed values rather than the plain text selectedOption.
Timeouts
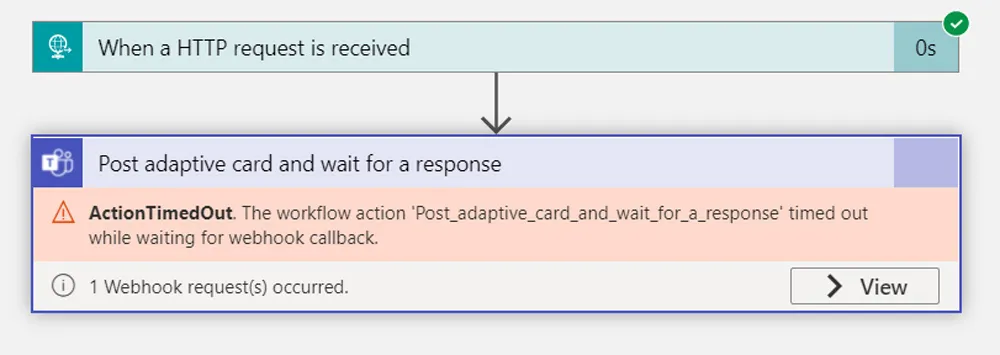
Behind the scenes, these blocks use a webhook callback from Microsoft Teams. When we run the logic app we will see that in the portal the step is shown as waiting.
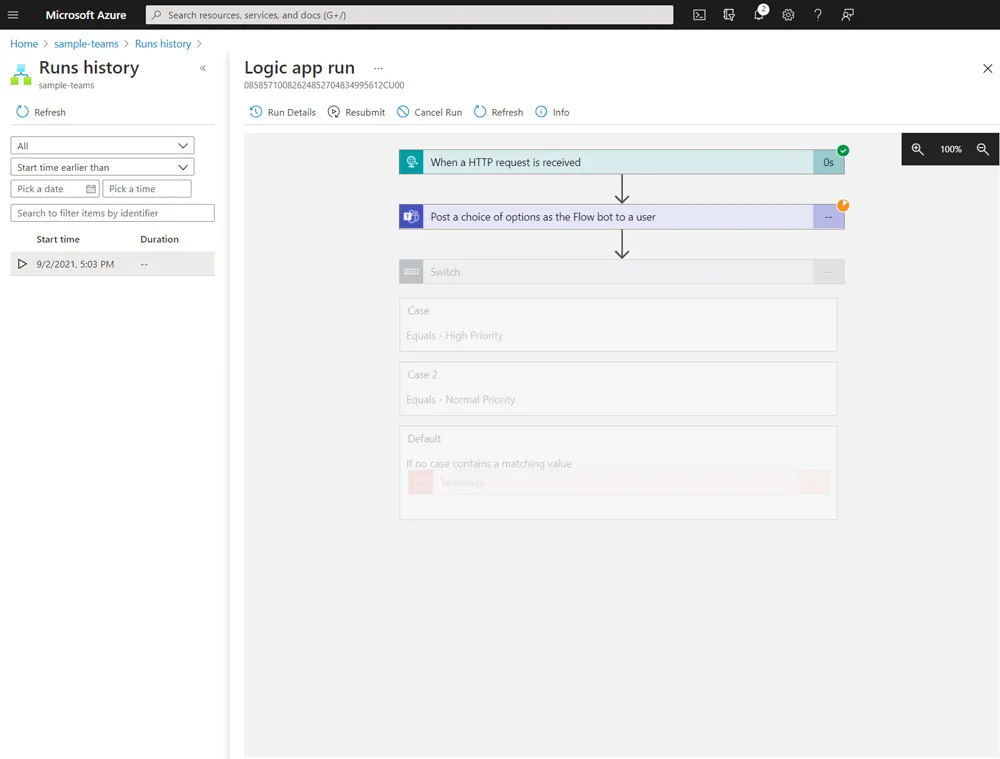
It will stay as waiting until the callback is made after the user has chosen a response. This will eventually time out if a reply is not received. I could find limited information on this but the default timeout could be as long as 30 days.
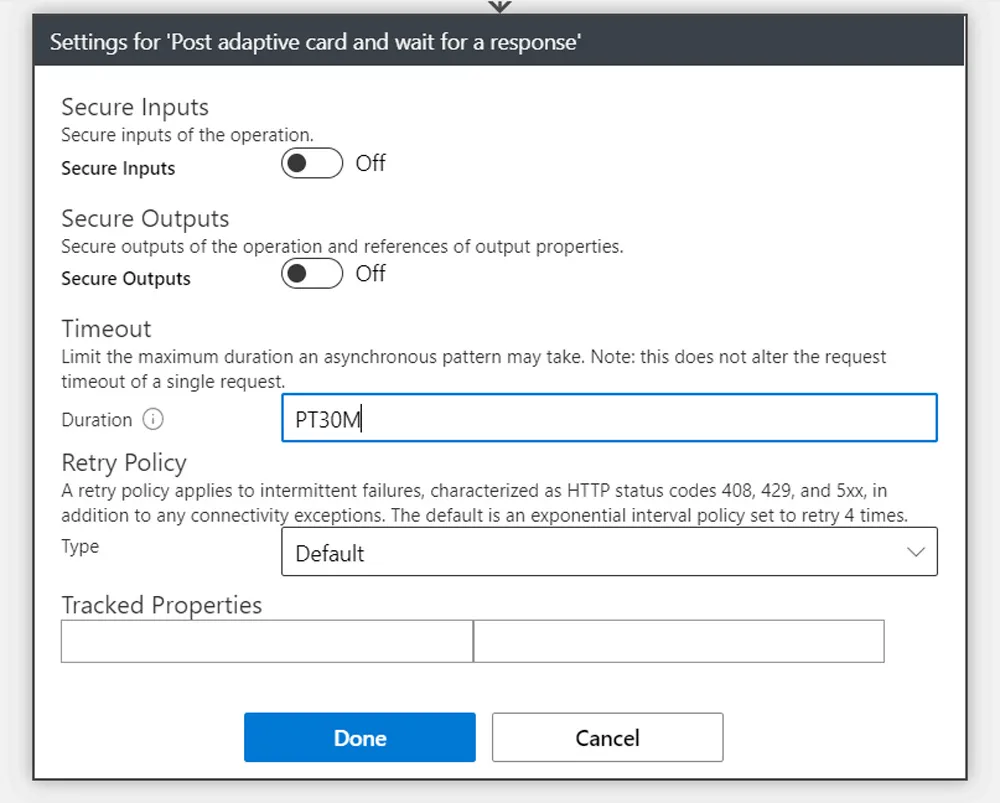
The good news is that you can set the timeout to your own value in ISO 8601 format under settings in the step menu behind ... A value such as PT30M would provide a timeout of 30 minutes.
If the timeout is reached the logic app will be marked as failed. You can manage this by creating a new step and selecting configure run after under the ... menu. From this, you can then select for this new step run to only run after a timeout preventing the failure.
Summary
Although we want to avoid manual intervention it is sometimes required for a human to decide.
In this post, we looked at the changes to the Microsoft Teams connector and the Post a choice of options as the Flow bot to a user action block. Using this it is possible to prompt a user in Microsoft Teams and then act on the choice. We then looked at how we can use adaptive cards to enhance the experience and base our actions on this.
For more information see the official documentation https://docs.microsoft.com/en-us/connectors/teams/
Title Photo by Jon Tyson.