Managing your Azure Resources with Deployment Stacks
For this year’s Azure Spring Clean, we are going to look at Azure Deployment Stacks.
Azure offers multiple ways to arrange and manage your Azure resources, however, deployment stacks (preview) offer a new approach and overcome some of the limitations of previous approaches. In this blog post, we will explore what deployment stacks are, and how you can use them to manage your Azure resources.
What are Deployment Stacks?
Deployment stacks are a new item in Azure, that we can attach resources to. In combination with existing bicep templates, this offers a range of abilities.
You would typically use a single resource group to group resources that share the same lifecycle, such as a web application and its database. This allows us to delete them together and apply RBAC permissions at that same level. However, it is not always as simple as this, and scenarios exist where applications can be found across multiple resource groups and even multiple subscriptions. A deployment stack can group resources across multiple scopes and manage the lifecycle as one.
As part of this, the deployment stack represents a stateful model and can remove items that were once part of the stack, now missing from the bicep files. In comparison, a standard bicep deployment has a complete mode to remove items not specified in the bicep file but do exist in the resource group. This, however, comes with the risk that it can pick up items never created by the bicep, something that is not an issue for the deployment stack.
The deployment stack also provides the option to bulk delete all resources covered by it in a single call across multiple scopes. This can be useful for scenarios such as temporary on-demand development environments.
Through deployment stacks, you can apply Deny settings to prevent the deletion and/or editing of resources. This can be used in combination with a set of limited exceptions, a useful feature for protecting production resources.
Getting Started with Deployment Stacks
In this post, I will use the Azure CLI commands however, you can also use Azure Powershell. You may need to update these tools to the latest version to ensure you have the latest features.
To switch from a bicep deployment to a deployment stack we do not need to update any bicep code, the change is in how we deploy it. In the example below, the bicep file I am referencing deploys two storage accounts in two separate resource groups. As it covers two resource groups it is using the subscription scope commands.
To use a deployment stack instead of using the command:
az deployment sub create --location uksouth --template-file .\main.bicepwe can switch over to use the command:
az stack sub create --name demoapp --location uksouth --template-file .\main.bicep --deny-settings-mode NoneThis creates a deployment stack and attaches the resources defined in the bicep file to it. It will not include any items implicitly created, for example, a storage account created by a function app, would not be included.
There are a few key differences to note with this new command. Firstly --name is now mandatory, and is now used to reference the deployment stack for future runs. We have also added --deny-settings-mode None. This is a required parameter that we will cover in more detail later.
It is important to note that we need to choose what scope to place the deployment stack as it can only attach resources that are at the same scope or lower. It may be beneficial to place the deployment stack higher up the hierarchy to restrict people with permissions at that level to edit the stack. This becomes important when the deployment stack is implementing deny restrictions that override the permissions of the user.
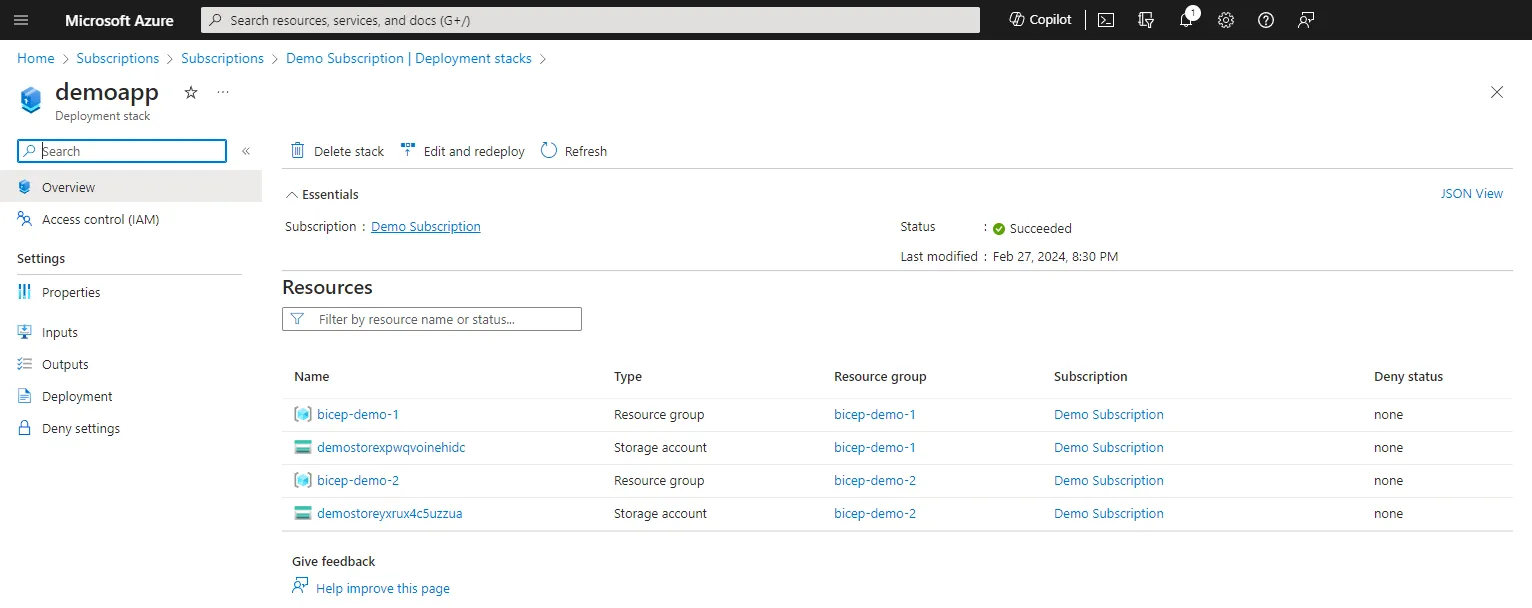
After running this command you can see the stack created in the portal. As I have created this at the subscription level, I can see it in the subscription. The deployment stack view is also in the resource group and management group for any stacks deployed to those scopes.
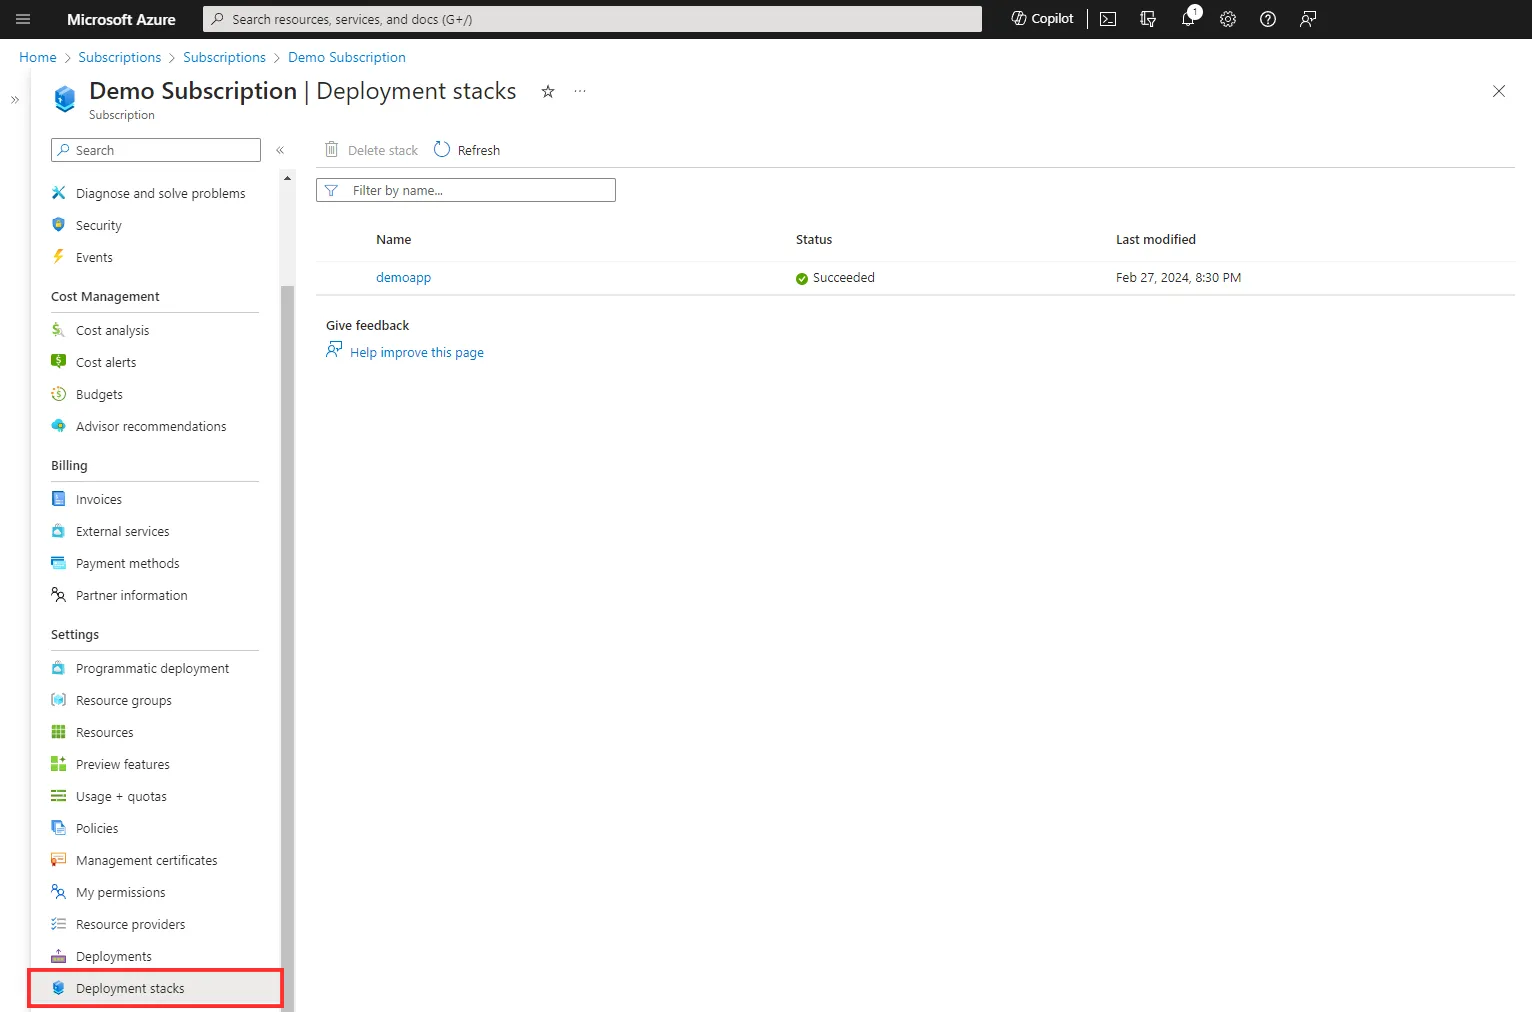
If you select the deployment stack you can see the resources it has deployed and attached to this stack. There are CLI commands that also can provide this information.
Resource Detachment and Deletion
We can detach resources from the deployment stack at any time. This does not delete the resources, it just removes them from the deployment stacks management. You can do this by removing the resource from the bicep file and running the same deployment again.
As the stack already exists, you are prompted to confirm the action. This prompt can be skipped with a --yes flag.
az stack sub create --name demoapp --location uksouth --template-file .\main.bicep --deny-settings-mode None --yesAlternatively, if we want to fully delete the resource, removed in the bicep instead of detaching it we can use the --delete-all, --delete-resources, or the --delete-resource-groups flag.
az stack sub create --name demoapp --location uksouth --template-file .\main.bicep --deny-settings-mode None --delete-all This is safer than a standard bicep deployment with --mode complete to remove items as it will only delete the resources that are no longer in the bicep but are found in the stack.
Removing the Stack
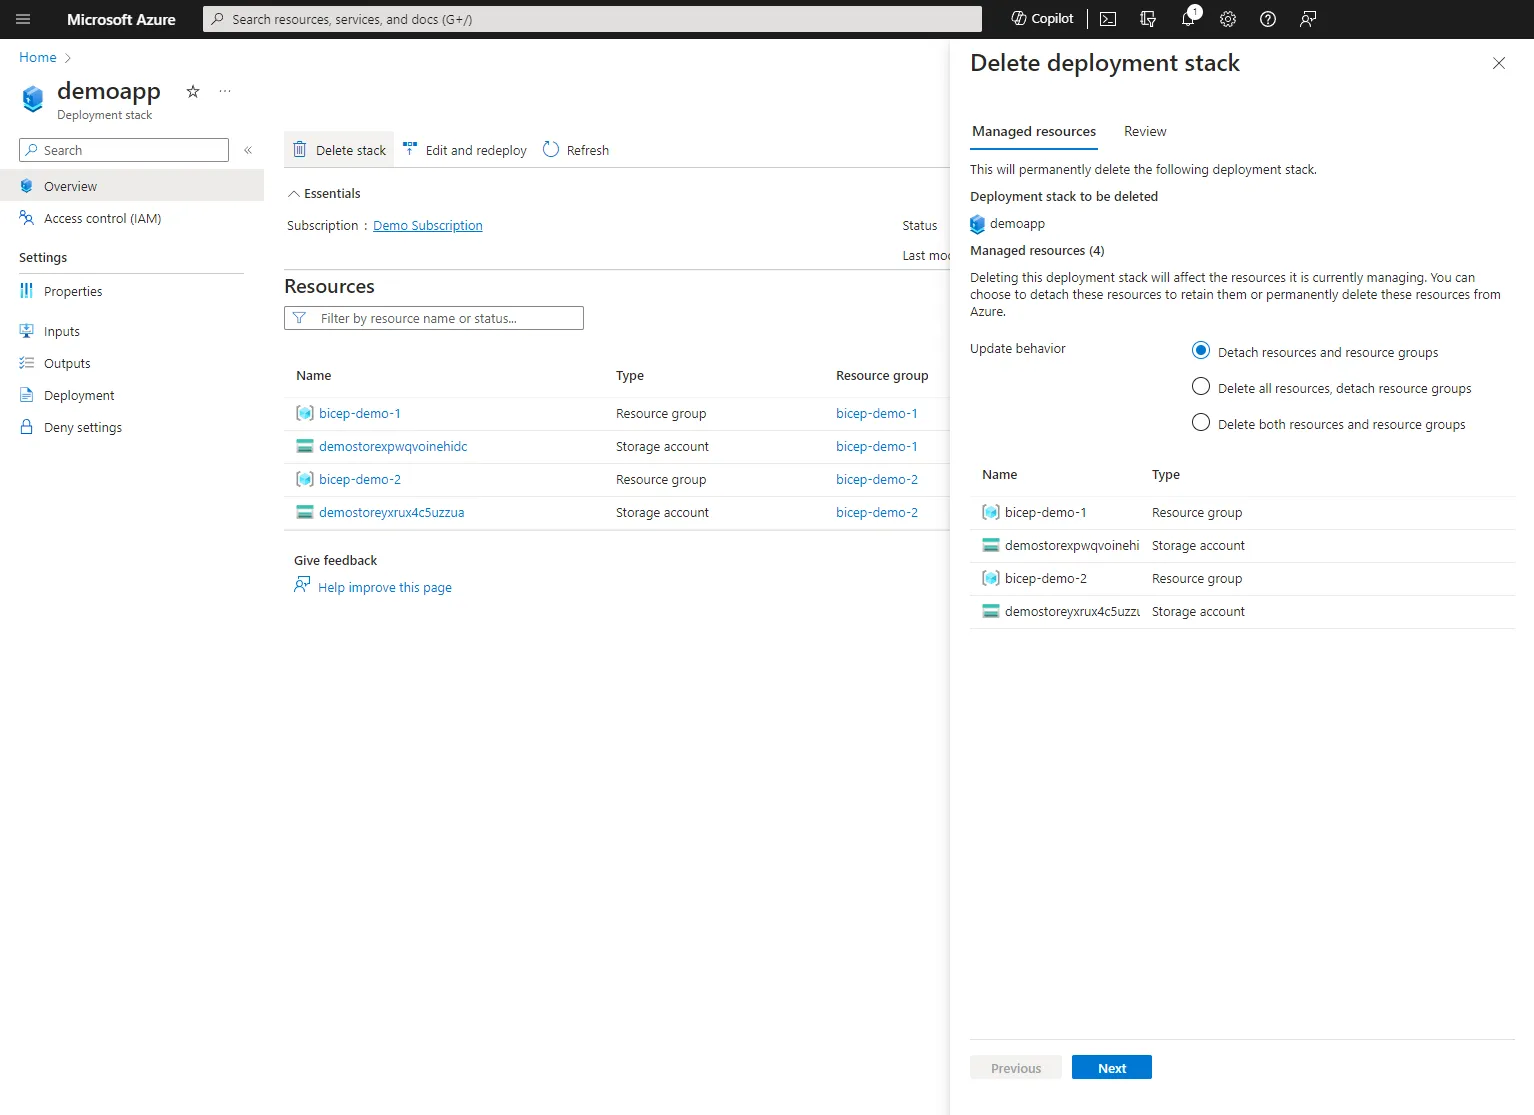
One of the most useful features is the ability to remove everything in the stack. When you delete a stack you have the same options on what to do with the resources in it when we update our bicep to remove items. We can detach the resources, delete all, delete resources, or delete the resource groups.
az stack sub delete --name 'demoapp' --delete-allThis is an action that can also be done in the portal.
Deny Permissions
One of the great features of deployment stacks is the ability to apply deny permissions on the control plane. This can be used to prevent the deletion and/or editing of resources even if the user has owner rights.
We saw in the first example that can use the --deny-settings-mode flag. This can be set to either None, DenyDelete, or DenyWriteAndDelete. These apply to everything defined in the stack, however, we can add exceptions to this.
There are two parameters we can use to override the deny settings. We can exclude actions from the deny by using --deny-settings-excluded-actions and a space-separated list of RBAC operations. This can be useful if you want to make everything read-only via DenyWriteAndDelete but allow a user to delete a specific resource type.
az stack sub create --name demoapp --location uksouth --template-file .\main.bicep --deny-settings-mode DenyWriteAndDelete --deny-settings-excluded-actions 'Microsoft.Storage/storageAccounts/blobServices/containers/delete'We can also set it so that the deny settings apply to all users except a space-separated list of service principles. This can be useful if you want to make everything read-only via DenyWriteAndDelete but allow a CI/CD process to make changes.
az stack sub create --name demoapp --location uksouth --template-file .\main.bicep --deny-settings-mode DenyWriteAndDelete --deny-settings-excluded-principals '12c3e899-c212-42f4-aa63-559aef92d0cf'General Observations
As I have been using deployment stacks and researching them, I have come across a few things I thought worth sharing.
Unlike many preview features, from what I can see there do not seem to be any geographical restrictions.
Having used Terraform before I wondered if deployment stacks could work beyond Bicep. They work with the ARM API so you can use ARM directly instead of Bicep if you need to. For Terraform there is an open GitHub Issue to support deployment stacks, however, due to the way Terraform manages its state it may not be possible.
While in preview there is no What-if support, like there is with a standard Bicep deployment, allowing you to see the changes before applying. This is a useful feature and I hope it is added in the future.
There are a few other limitations and I would recommend checking out the known issues.
Learning More
Hopefully, this post has given you a good understanding of what Bicep Deployment Stacks are and how you can use them to organise your Azure resources. If you want to learn more about Bicep Deployment Stacks, I would recommend checking out the following resources that I found useful:
Conclusion
Deployment stacks allow us to manage a set of resources together no matter where they are located. We can use deployment stacks without changing our Bicep templates just focusing on changing the commands we use to deploy.
They provide several unique useful features including, the ability to detach resources from the stack, delete resources, and apply deny permissions. I am looking forward to seeing how deployment stacks develop and how they are used in the future.
This blog post is part of Azure Spring Clean 2024, please check out the website](https://www.azurespringclean.com/https://www.azurespringclean.com/) for some great Azure articles.
Title Photo by Markus Spiske on Unsplash