How to Create Azure Resource Graph Explorer Scheduled Reports and Email Alerts
Azure has many ways to be notified of activity from budget alerts to Azure Monitor Alerts each of which can attach to action groups using the portal.
This is not the case when it comes to Azure Resource Graph Explorer. You can query resources that are deployed to Azure and produce reports and graphs to attach to dashboards. You cannot however set up scheduled reports, triggers and or action groups on these so easily.
Using Logic apps, a system assigned identity and the Azure Resource Graph Explorer Rest API we can quickly configure email reports and basic alerting.
Creating the Query
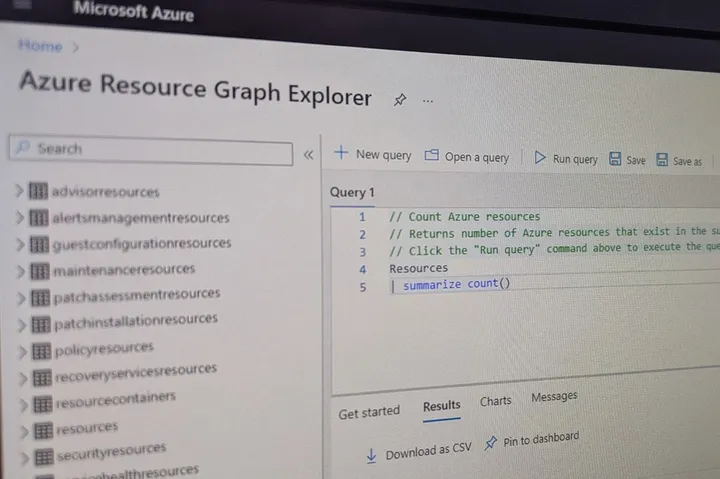
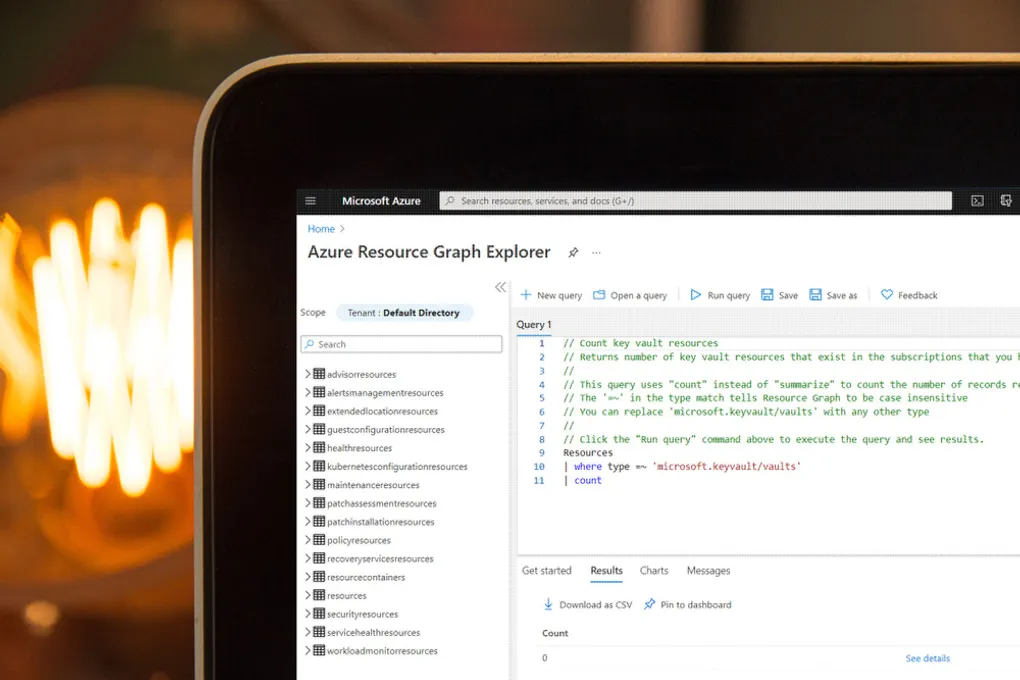
Inside the Azure Resource Graph Explorer you can create queries using the Kusto Query Language (KQL) that when run produce tables of data about your deployed resources. There are many uses from counting resources by their tags to finding unpatched machines.
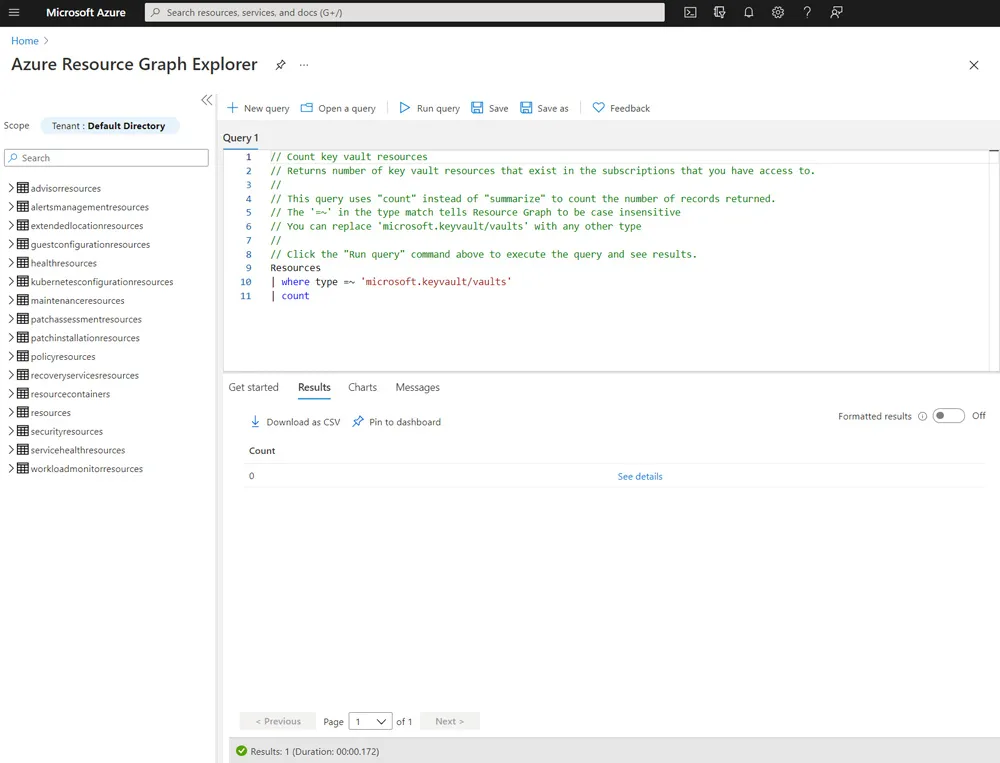
In this demo we will use a simple query to count the number of key vaults in our subscription however the concepts are the same with more complex queries.
Resources
| where type =~ 'microsoft.keyvault/vaults'
| count
Building the Logic App
The REST API can be consumed in many ways however by placing it in an Azure Logic app we can use a system managed identity making the authentication seamless.
Start by creating a consumption-based Logic app with a Recurrence trigger. For a scheduled report set the chosen interval, for an alert set the interval to the frequency you wish to check the condition.
Enable Managed Identity
Before we can continue, we must next enable Identity on the Logic App, which can be done from the left hand menu.
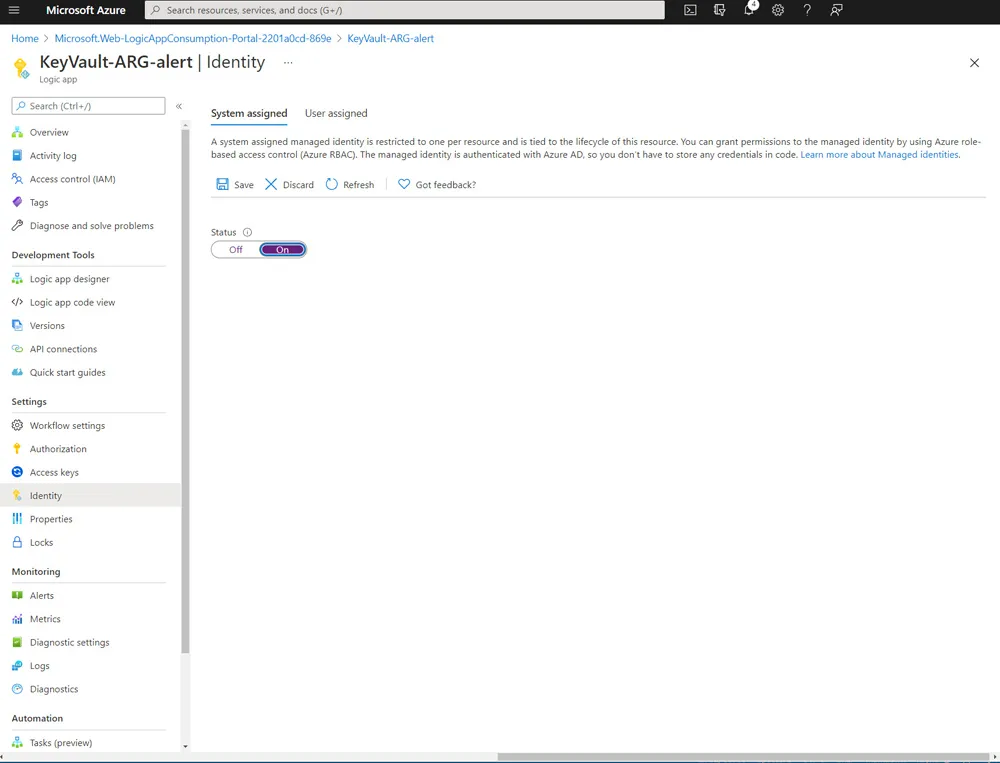
Once this is saved you will then see an Add Role Assignment option. For this query to run you will need to add a reader role at the subscription level.
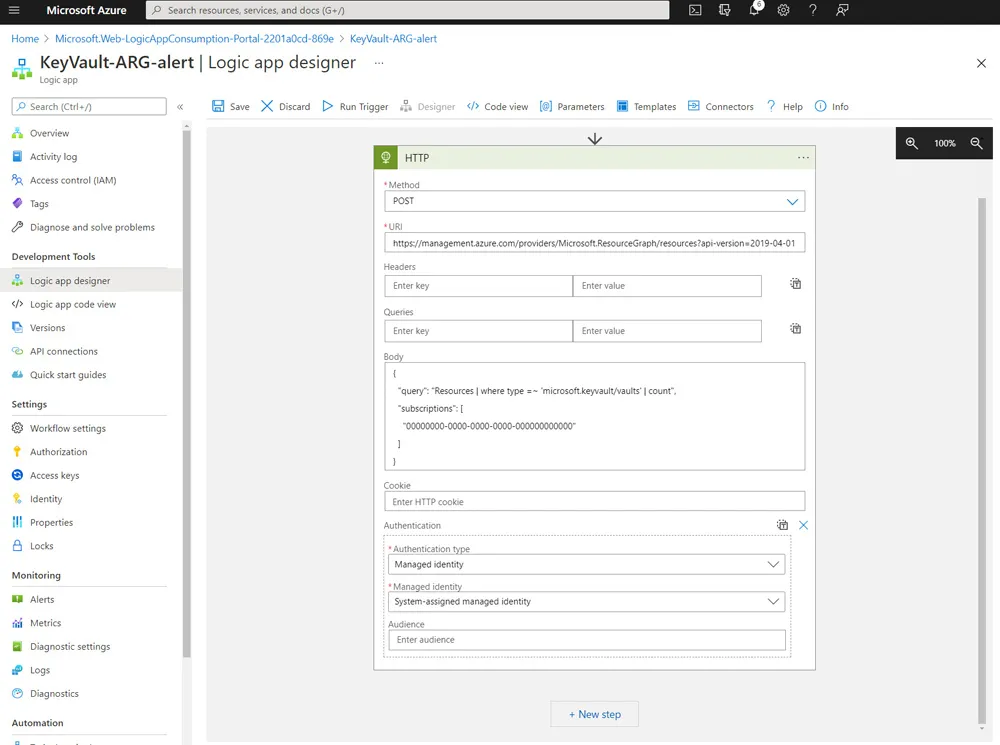
HTTP API Request
Back in the logic app designer the next step is to add a HTTP Action block to make the API request. Use the following details and set the subscription ID of your subscription.
Method: POST
Uri: https://management.azure.com/providers/Microsoft.ResourceGraph/resources?api-version=2019-04-01
Body:
{
  "query": "Resources | where type =~ 'microsoft.keyvault/vaults' | count",
  "subscriptions": [
    "00000000-0000-0000-0000-000000000000"
  ]
}
At the end of the HTTP Action block, you will see an option to Add new parameter. Select this and then check Authentication. Once you move off this you can choose the authentication type, which in this case needs to be Managed Identity.
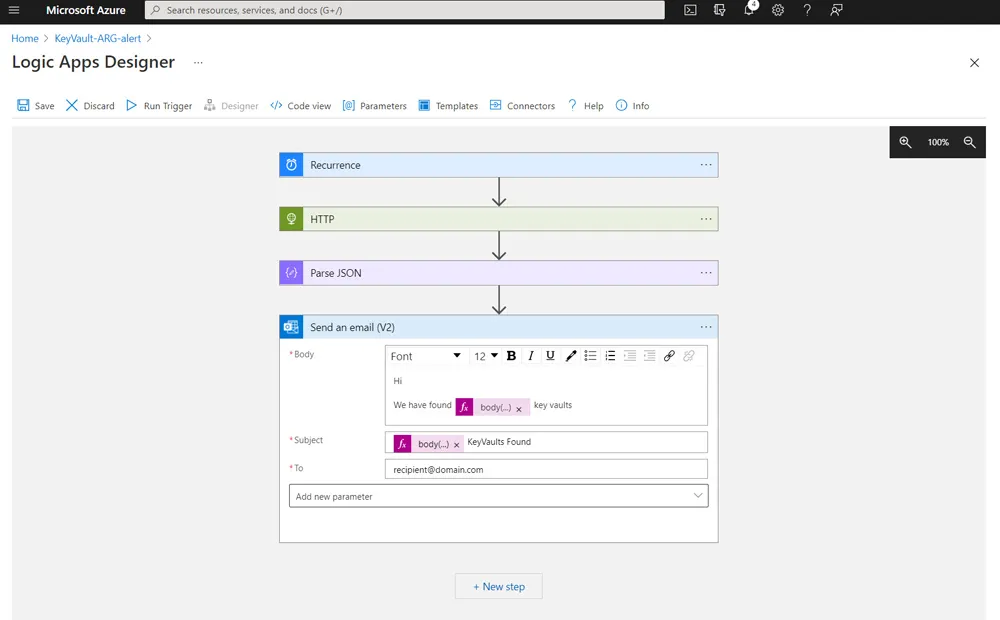
A Parse JSON action block is next required to parse the results that come back from the API. For this block we can use the following schema.
{
    "properties": {
        "count": {
            "type": "integer"
        },
        "data": {
            "properties": {
                "columns": {
                    "items": {
                        "properties": {
                            "name": {
                                "type": "string"
                            },
                            "type": {
                                "type": "string"
                            }
                        },
                        "required": [
                            "name",
                            "type"
                        ],
                        "type": "object"
                    },
                    "type": "array"
                },
                "rows": {
                    "items": {
                        "items": {
                            "type": "integer"
                        },
                        "type": "array"
                    },
                    "type": "array"
                }
            },
            "type": "object"
        },
        "facets": {
            "type": "array"
        },
        "resultTruncated": {
            "type": "string"
        },
        "totalRecords": {
            "type": "integer"
        }
    },
    "type": "object"
}
Sending the Email
You could add a range of action blocks next to send a notification including connecting to MS teams or GMail. In this demo I have chosen to use an office 365 connection to send an email.
The data comes back as an array of rows with each item being an array of the column data. It is possible to use this to make a CSV report or build a HTML table.
In this example however we are only using a single value so we can get this with the expression body('Parse_JSON')?['data']?['rows'][0][0] which is taking the first row and first column.
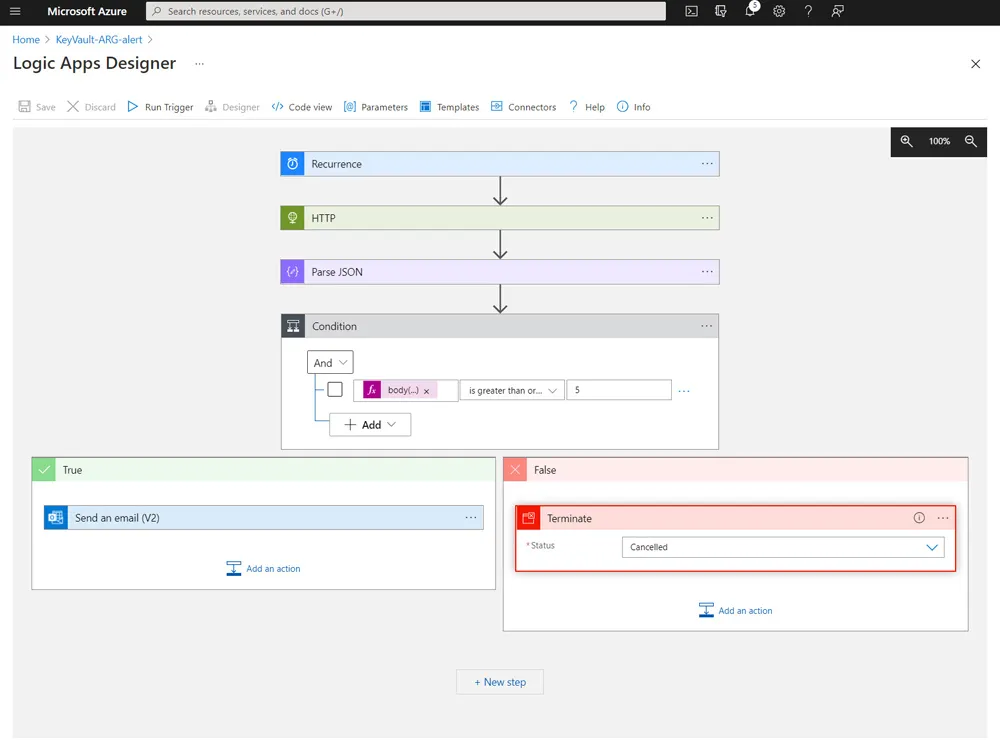
Adding Conditions
So far this logic app will send an email every time it is triggered on the recurrence. To make this into an alert you can add in a condition to only send when a threshold is met. This is done using a Condition block and the previous expression to check the value skipping the email if the condition is not met.
Summary
Azure Resource Graph Explorer is very powerful however does not support scheduling email reports or alerting. Through the use of the REST API and a logic app we have seen how both email reports and alerting can be configured.
Title Photo by Stephen Phillips on Unsplash.