Deploying an Astro Website to Azure Static Web Apps
This site has recently been updated to use the Astro framework, deploying on Azure static web apps. Astro provide an official guide on how to deploy to Azure, however in this post, I wanted to dig a little deeper, adding a few extra screenshots, plus cover some of the challenges and issues I faced.
What is Astro?
The Astro framework is one of a growing list of static site generators. Astro is optimised for sites that work with a large amount of pages, has a react like syntax and the page can be server side rendered into a static site. They have just launched version 3 and there’s a huge community behind it.
What is a Static Web App?
Azure Static Web Applications (SWA) are an Azure resource that allow you to host static websites alongside Azure functions. They have both a very generous free tier and more advanced paid tier.
You cannot access the files directly the code is built and deployed using a GitHub action or Azure pipeline template. This is pretty typical with a static site as you need to rebuild and redeploy each time you make a change.
Getting Setup
Azure Static Web Apps will work with either GitHub actions or Azure pipelines along with a range of source control solutions. For this example, however we’re just going to stick with GitHub and GitHub Actions.
Start by creating a blank application using all the recommended defaults. If you have an existing Astro website, then the rest of the guide should still work.
npm create astro@latestOnce this is complete then add and commit all the files before pushing to a GitHub repository.
Setting Node Engines
At the time of writing, the build script we will use later needs to know the right version of node to use. To enable this update your projects package.json file with this snippet.
  "engines": {
    "node": ">=18.0.0"
  },
SWA with VS Code
The easiest way to create an SWA is to use the Azure Static Web Apps VS Code extension. Inside VS Code ensure that you have the Astro folder open in VS Code before you continue.
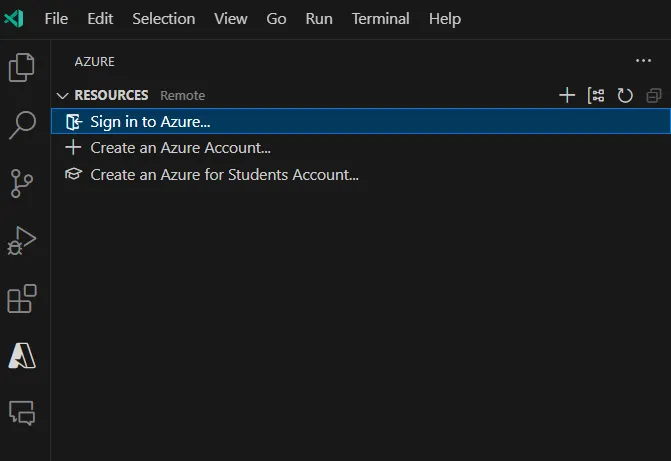
Once you’ve installed the extension you will see the Azure logo appear in the left icon tray. Log into your Azure subscription using the menu on the left-hand side.
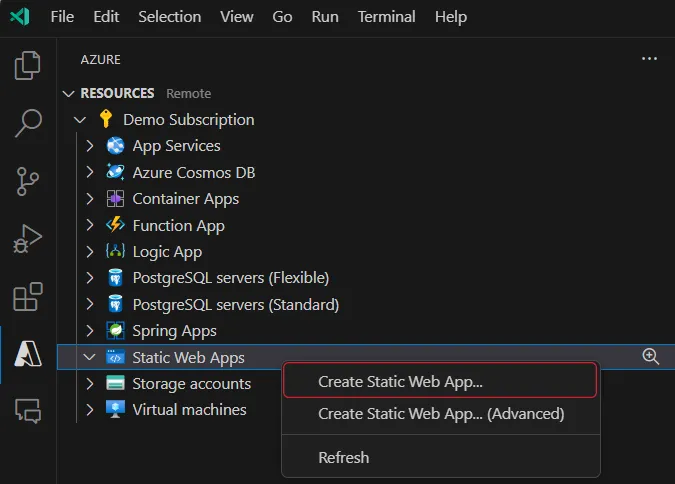
You then should be able to expand your subscription and find Static Web Apps. If you right click on this you will see the option to `Create Static Web App…“.
The advanced option lets you set the resource group, pricing tier and api details. For many cases the non-advanced option is good enough as the group name defaults to the app name and the tier defaults to free.
Upon selecting the create option it will launch the wizard that will take you through the five steps you need to create the application.
In Step 1 choose a name that will become the name of both the resource group and the Static Web App resource, before then selecting a region in Step 2.
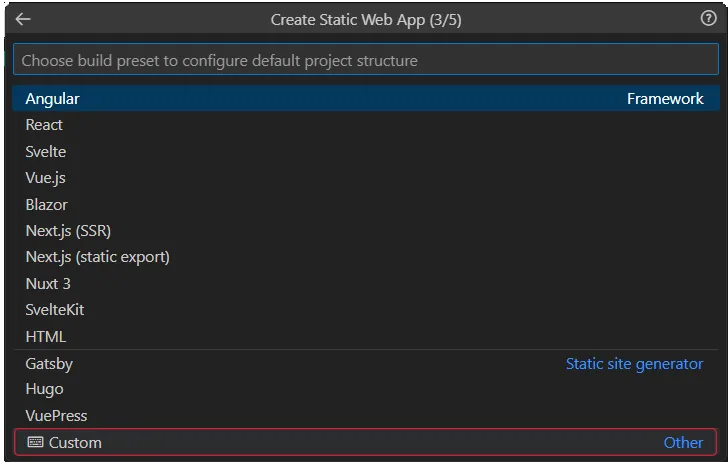
In Step 3 were prompted to select the framework we are using. Astro is not currently one of the templates available, so we need to select the custom option from the list.
In Step 4 will leave the value as the default.
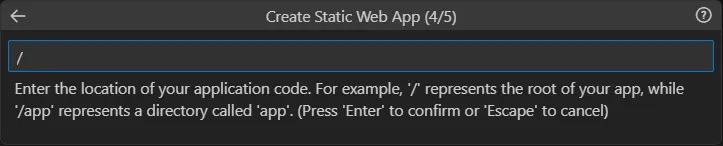
Astro builds to a dist folder so in Step 5 we need to change the provided value to /dist

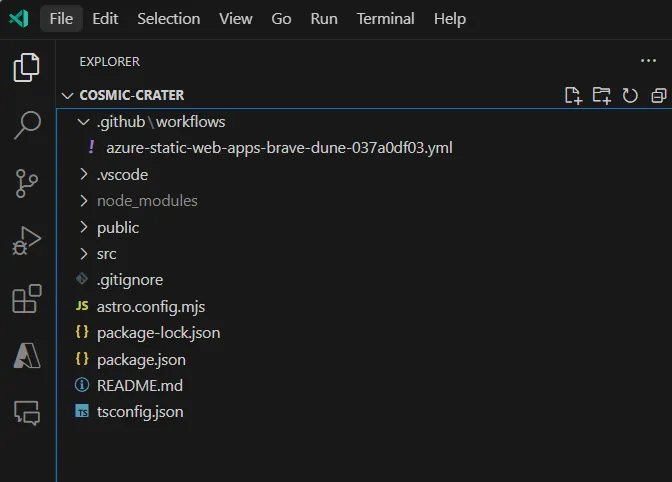
When this is complete your app will be created in Azure. It will also create a new GitHub action yml file in your repo.
If you switch over to GitHub you will see a new workflow would have been run for your site and it should have been successful.
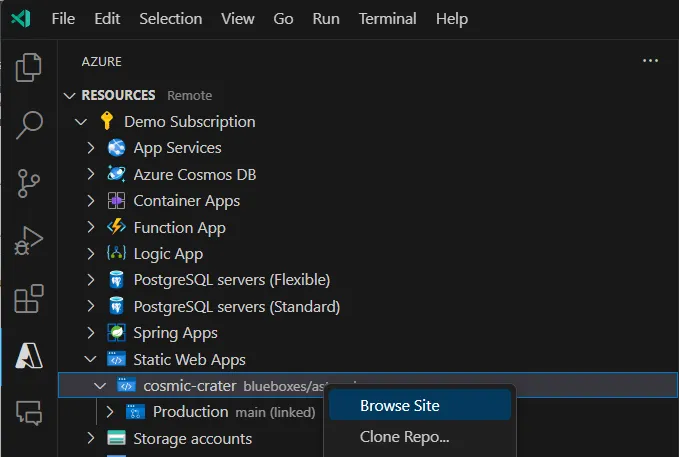
You can browse to the site by using the right click menu in the VS extension.
Each time you create a branch and then a pull request, a new preview site will be generated for you.
SWA with the Azure Portal
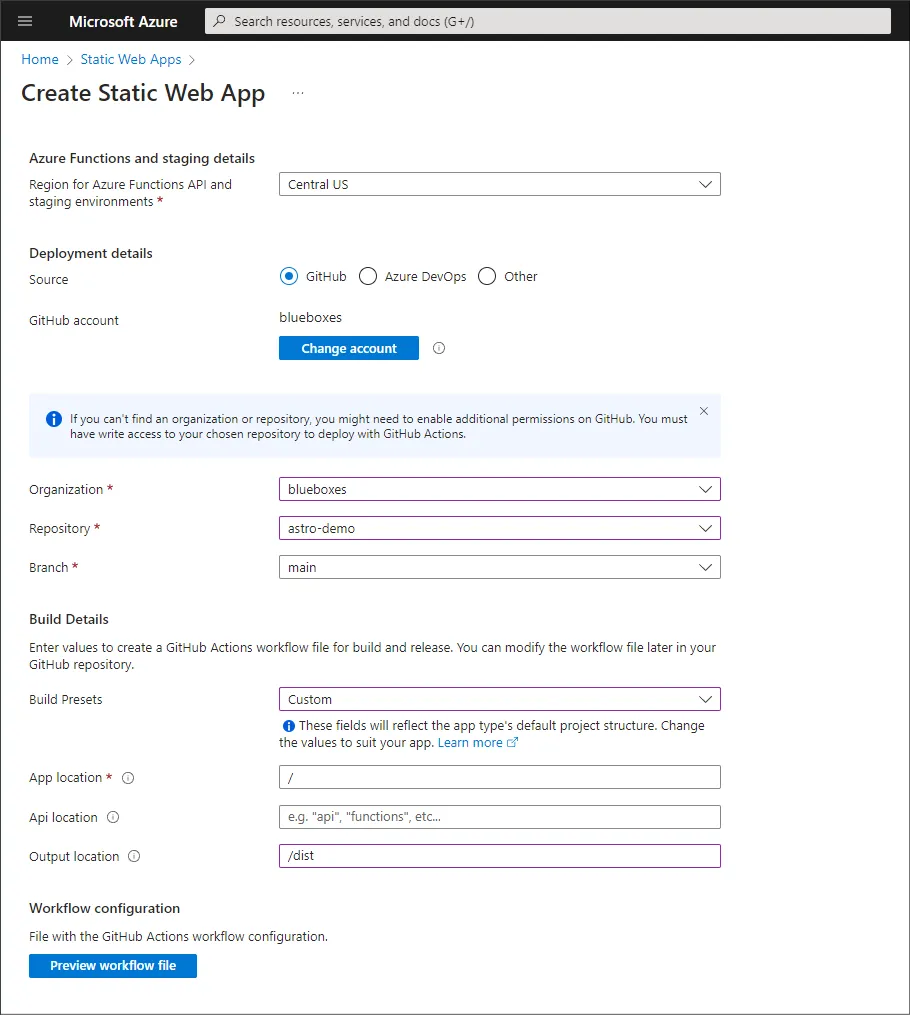
Alternatively, you can manually create the SWA resource inside the Azure portal. As part of the setup you are asked to login to GitHub so it can create the Github Action and set the necessary secrets.
During the setup you will need to set the Build Preset to Custom and the Output Location to \dist as shown below.
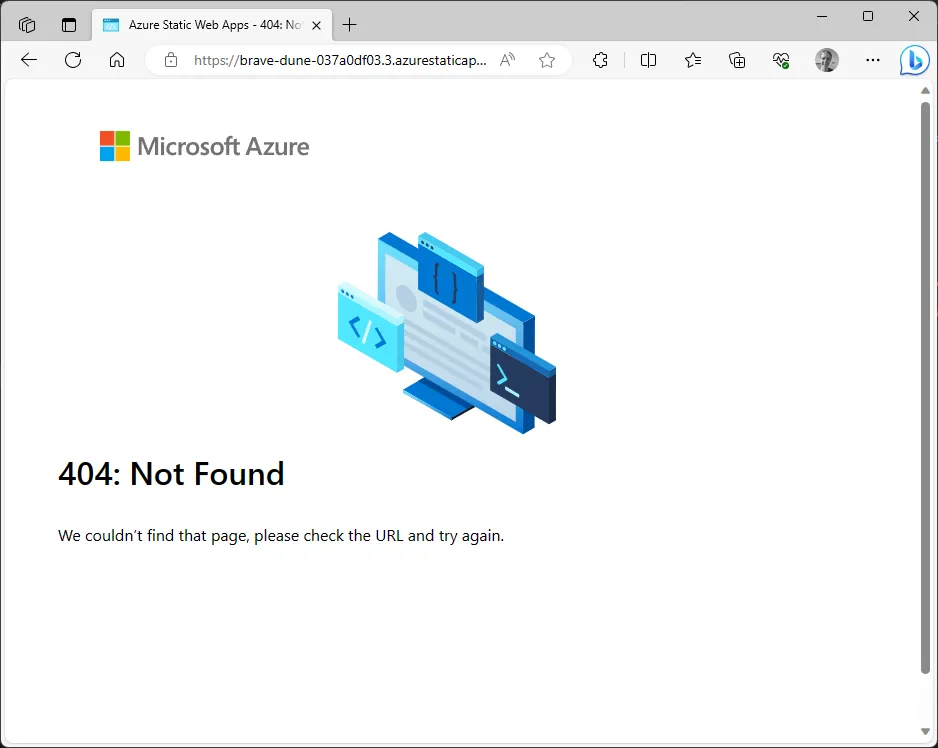
404 Pages
You may notice, if you go to a page that does not exist locally you see the Astro 404 page. On the deployed version however, you will see an Azure error page.
To resolve this, first create a custom 404 page in your site. Under the src/pages folder add a new page 404.astro.
---
import Layout from '../layouts/Layout.astro';
---

<Layout title="Page Not Found.">
    <h1>404 :(</h1>
</Layout>
Then at the root of your project, next to the package.json add a new staticwebapp.config.json file to set the page to show upon a 404 error.
{
    "responseOverrides": {
      "404": {
        "rewrite": "/404",
        "statusCode": 404
      }
    }
}
Once this is deployed you will now see your custom error page.
Default Headers and Redirects
The staticwebapp.config.json can be used with many more options. You can add redirects which can be useful if you are migrating an old site. You can also set default http headers to be sent with your application, enforce trailing slashes and many other options.
The full documentation can be found on the Configure Azure Static Web Apps guide.
Summary
In this post we covered how to deploy an Astro website to Azure Static Web Apps. We covered how to create the site using the VS Code extension and the Azure portal. We also covered how to set a custom 404 page and how to use the staticwebapp.config.json file to set default headers and redirects.
In a future post I will cover my migration journey from Gatsby to Astro.
For more information check out these links:
Title Background Photo by Andy Holmes on Unsplash