Creating Scheduled Reports from Azure Devops with Azure logic apps
Azure DevOps has many features; however it is missing the functionality to send scheduled reports from DevOps. We can fill this gap and others using an Azure Logic App along with the DevOps connectors.
Throughout this post we will be using consumption plan Azure logic apps, however these techniques are also possible using a standard plan.
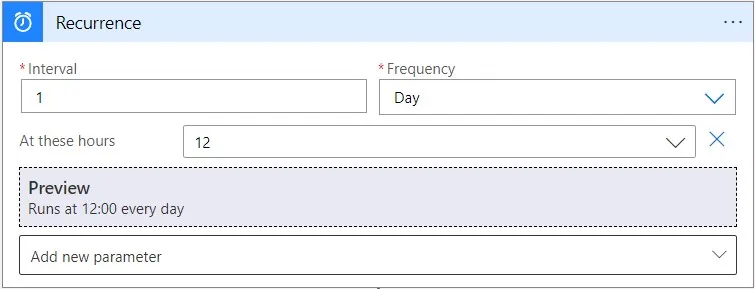
Recurrence Trigger
We will start by creating a new consumption plan logic app based on a recurrence trigger. By default, the trigger is scheduled at a set interval. We can alter the logic to trigger at a set time of day and other options by selecting the Add new Parameter option.
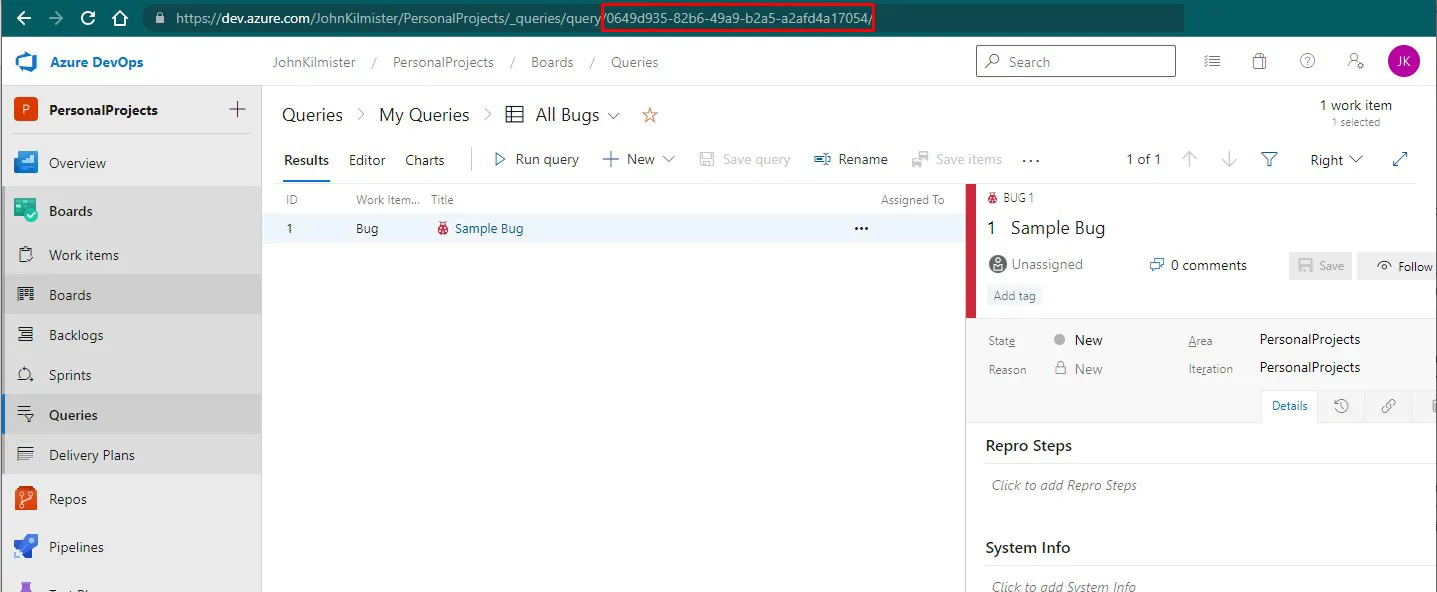
Configuring the Data Source
The next step on creating the report is to run and then save a query inside Azure DevOps. From this we can gather the query ID located in the URL. It is this ID that we will need later in the logic app to run the scheduled report.
DevOps Connector
Logic apps allow us to use an Azure DevOps connector. Under this there is a whole set of actions allowing us to use many of the features of the API. By using the DevOps connector rather than the API directly we do not have to manage personal access tokens (PATs) and worry about expiry dates as all of this is managed for us.
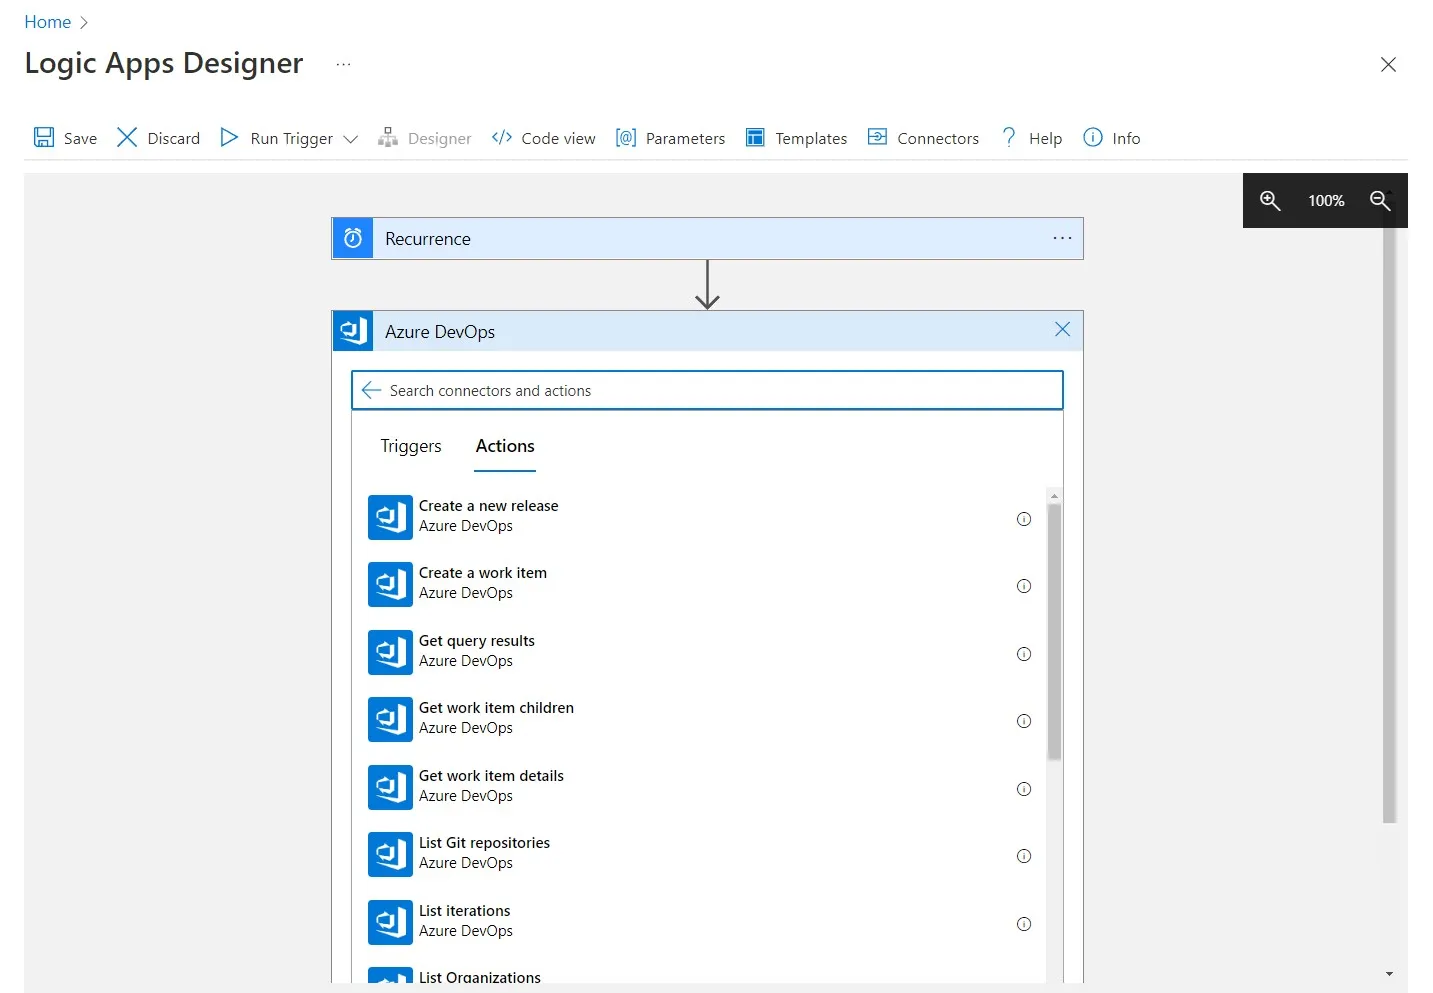
Note that some of the API features are not available as actions, however there is an additional action that allows us to hit any Azure DevOps API endpoint.
In our case there is an action that is appropriate. The Get query results action will run a saved query from Azure DevOps and return the results as JSON.
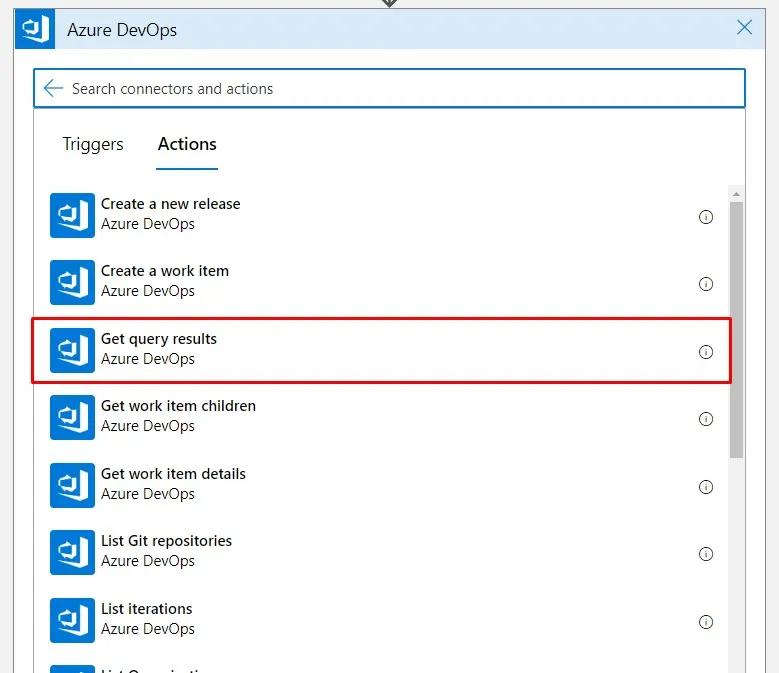
Once selected you will need to authorise the logic app to access your DevOps account. Following this you’ll be able to select from the drop down your organisation and relevant project. You must enter the query ID which we had previously gained from the URL inside DevOps.
Building an Attachment
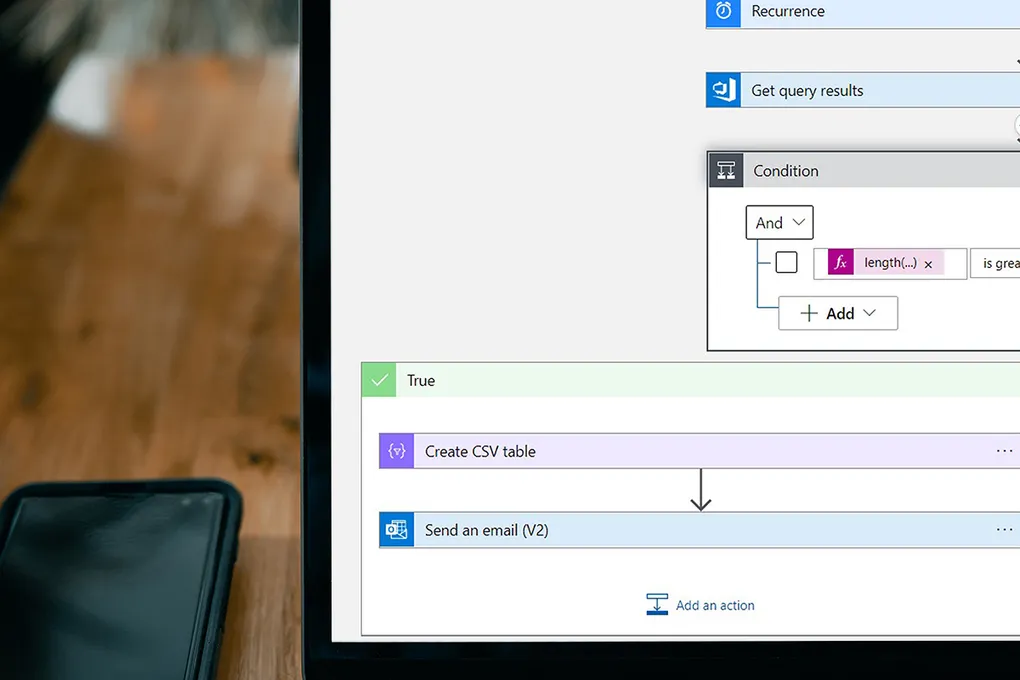
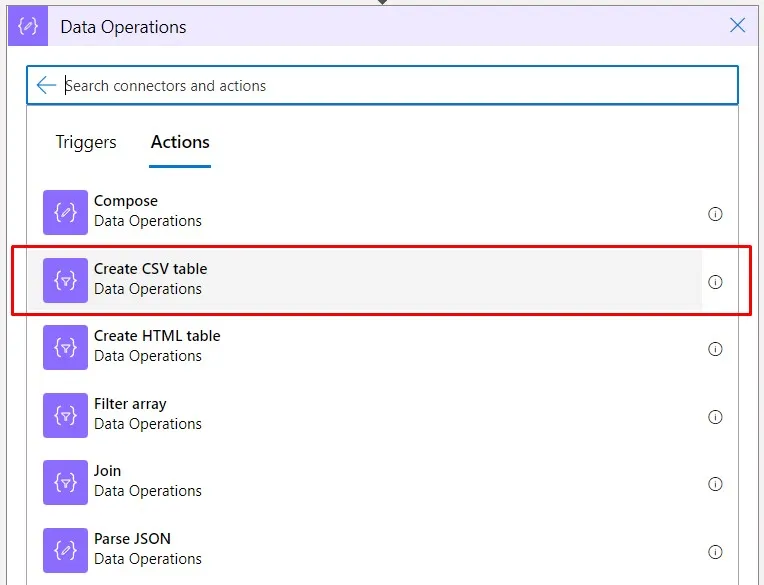
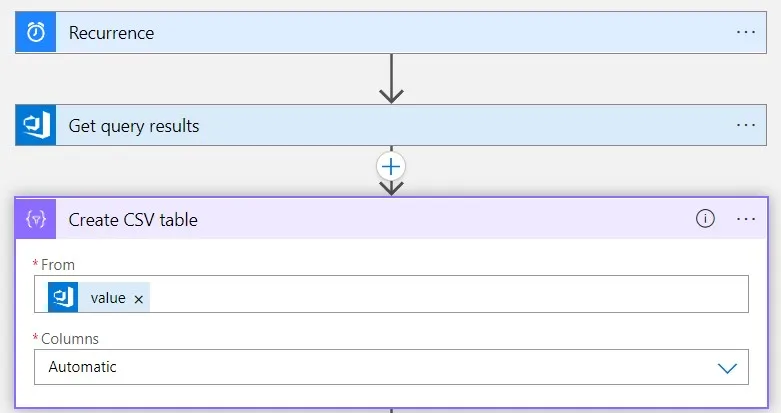
In this sample we plan to attach the results as a CSV file, therefore we need to transform the JSON returned by the DevOps block into CSV format. This can easily be done with a new Create CSV table action.
If you plan to post the content either into the body of an e-mail or into a teams message instead you will need a different action to transform the JSON data such as the Create HTML table action.
Sending an Email
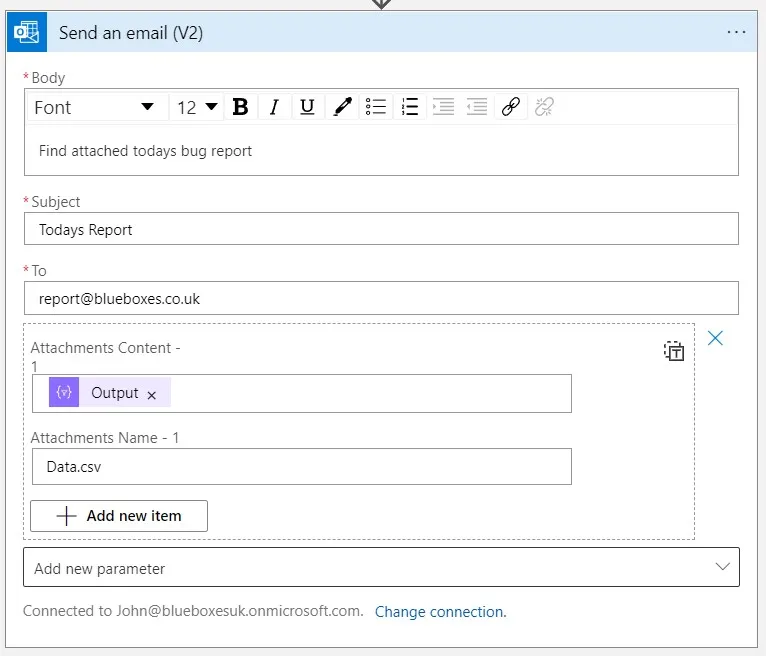
Now we have the CSV data we can add it to an e-mail and send it. This can be done using an outlook connector and send e-mail action.
Adding Conditions
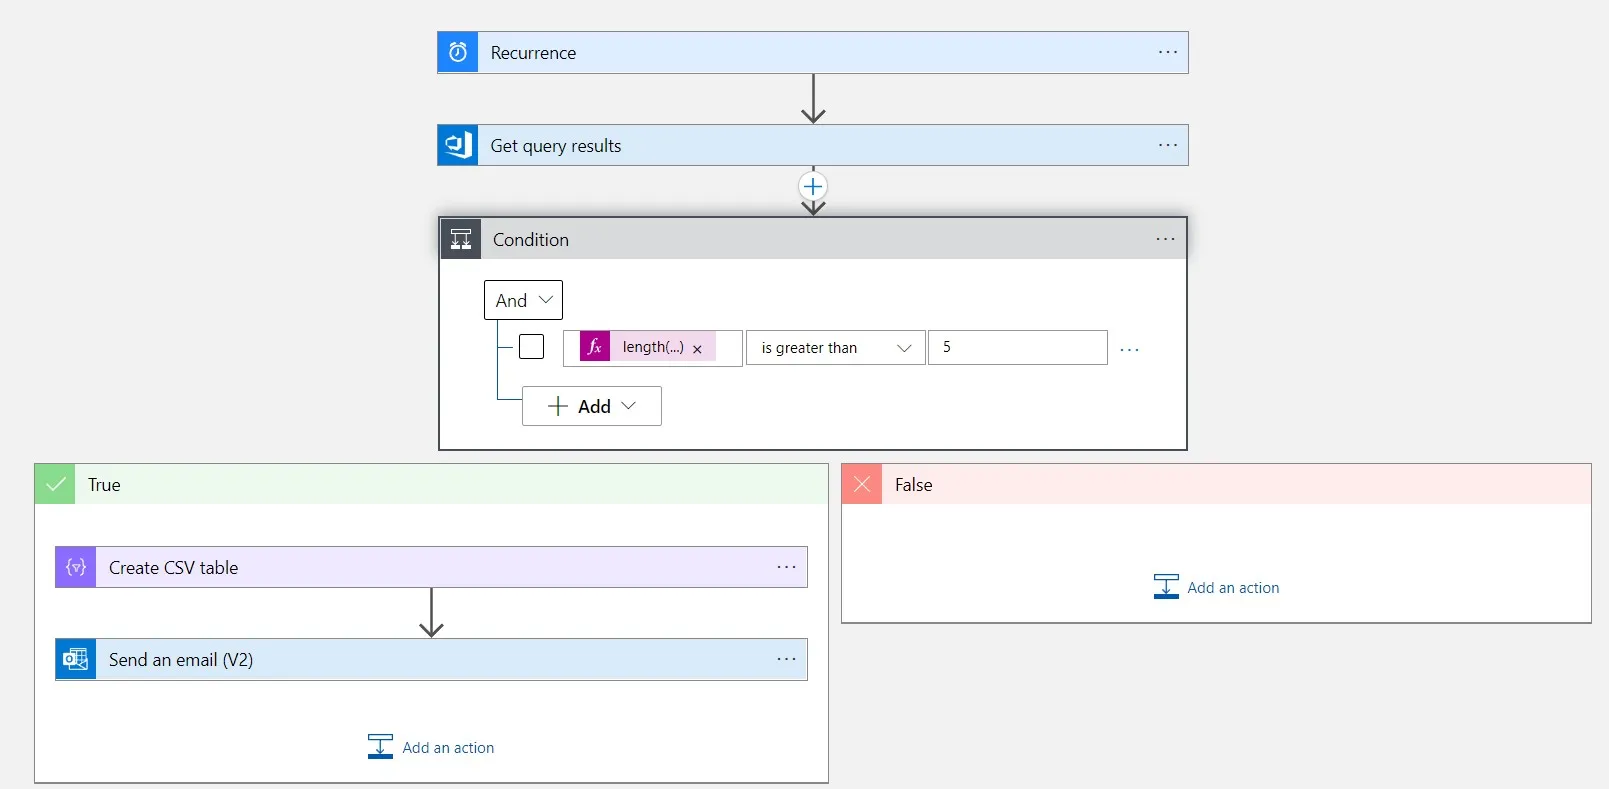
As we are working with data it is possible to add in conditions, for example only sending the e-mail if we have more than five results returned by the query.
This could simply be done by adding a conditional block after fetching the results that checks the count using length(body('Get_query_results')?['value'])
Further Options
Being a logic app with having hundreds of connectors at your disposal there are lots of further options. You could post the update into Microsoft Teams using adaptive cards or triggering other API endpoints.
Summary
In this post we looked at how to take a query built in Azure DevOps and run it on a scheduled timer. using the DevOps connector, we then looked at how we could add those results to a CSV file and attach them to an e-mail. Finally, we looked at how we could refine this to only send when we had more than 5 results.
Title Photo by Tech Daily on Unsplash